Get Inspired: DIY Home Workspace Upgrade that Boosts Your Productivity

Author: Lance Cody-Valdez (Free-lance-now.com)

Whether working from home has always been your modus operandi, or you’re making the pandemic-era work arrangement a permanent one, giving your home workspace a facelift can provide you with inspiration that can fuel any midday or mid-week doldrums. Even if you just use your desk to pay bills and do your taxes, calculations can seem a bit less stressful when you’re organized and enveloped in a calm and inviting environment. From practical office equipment to serene artwork, you can create an enviable yet functional workspace, and you don’t need to take out a loan to do it!

Theme and additions

Ask yourself what kind of office do you enjoy walking into every day? If you used to dread passing through doors that led to corporate “drab” day in and day out, then leave the traditional office accoutrements to the traditionalists in favor of a bold, energized motif, or a more calm, zen space that can double as your yoga den when you need a work break.

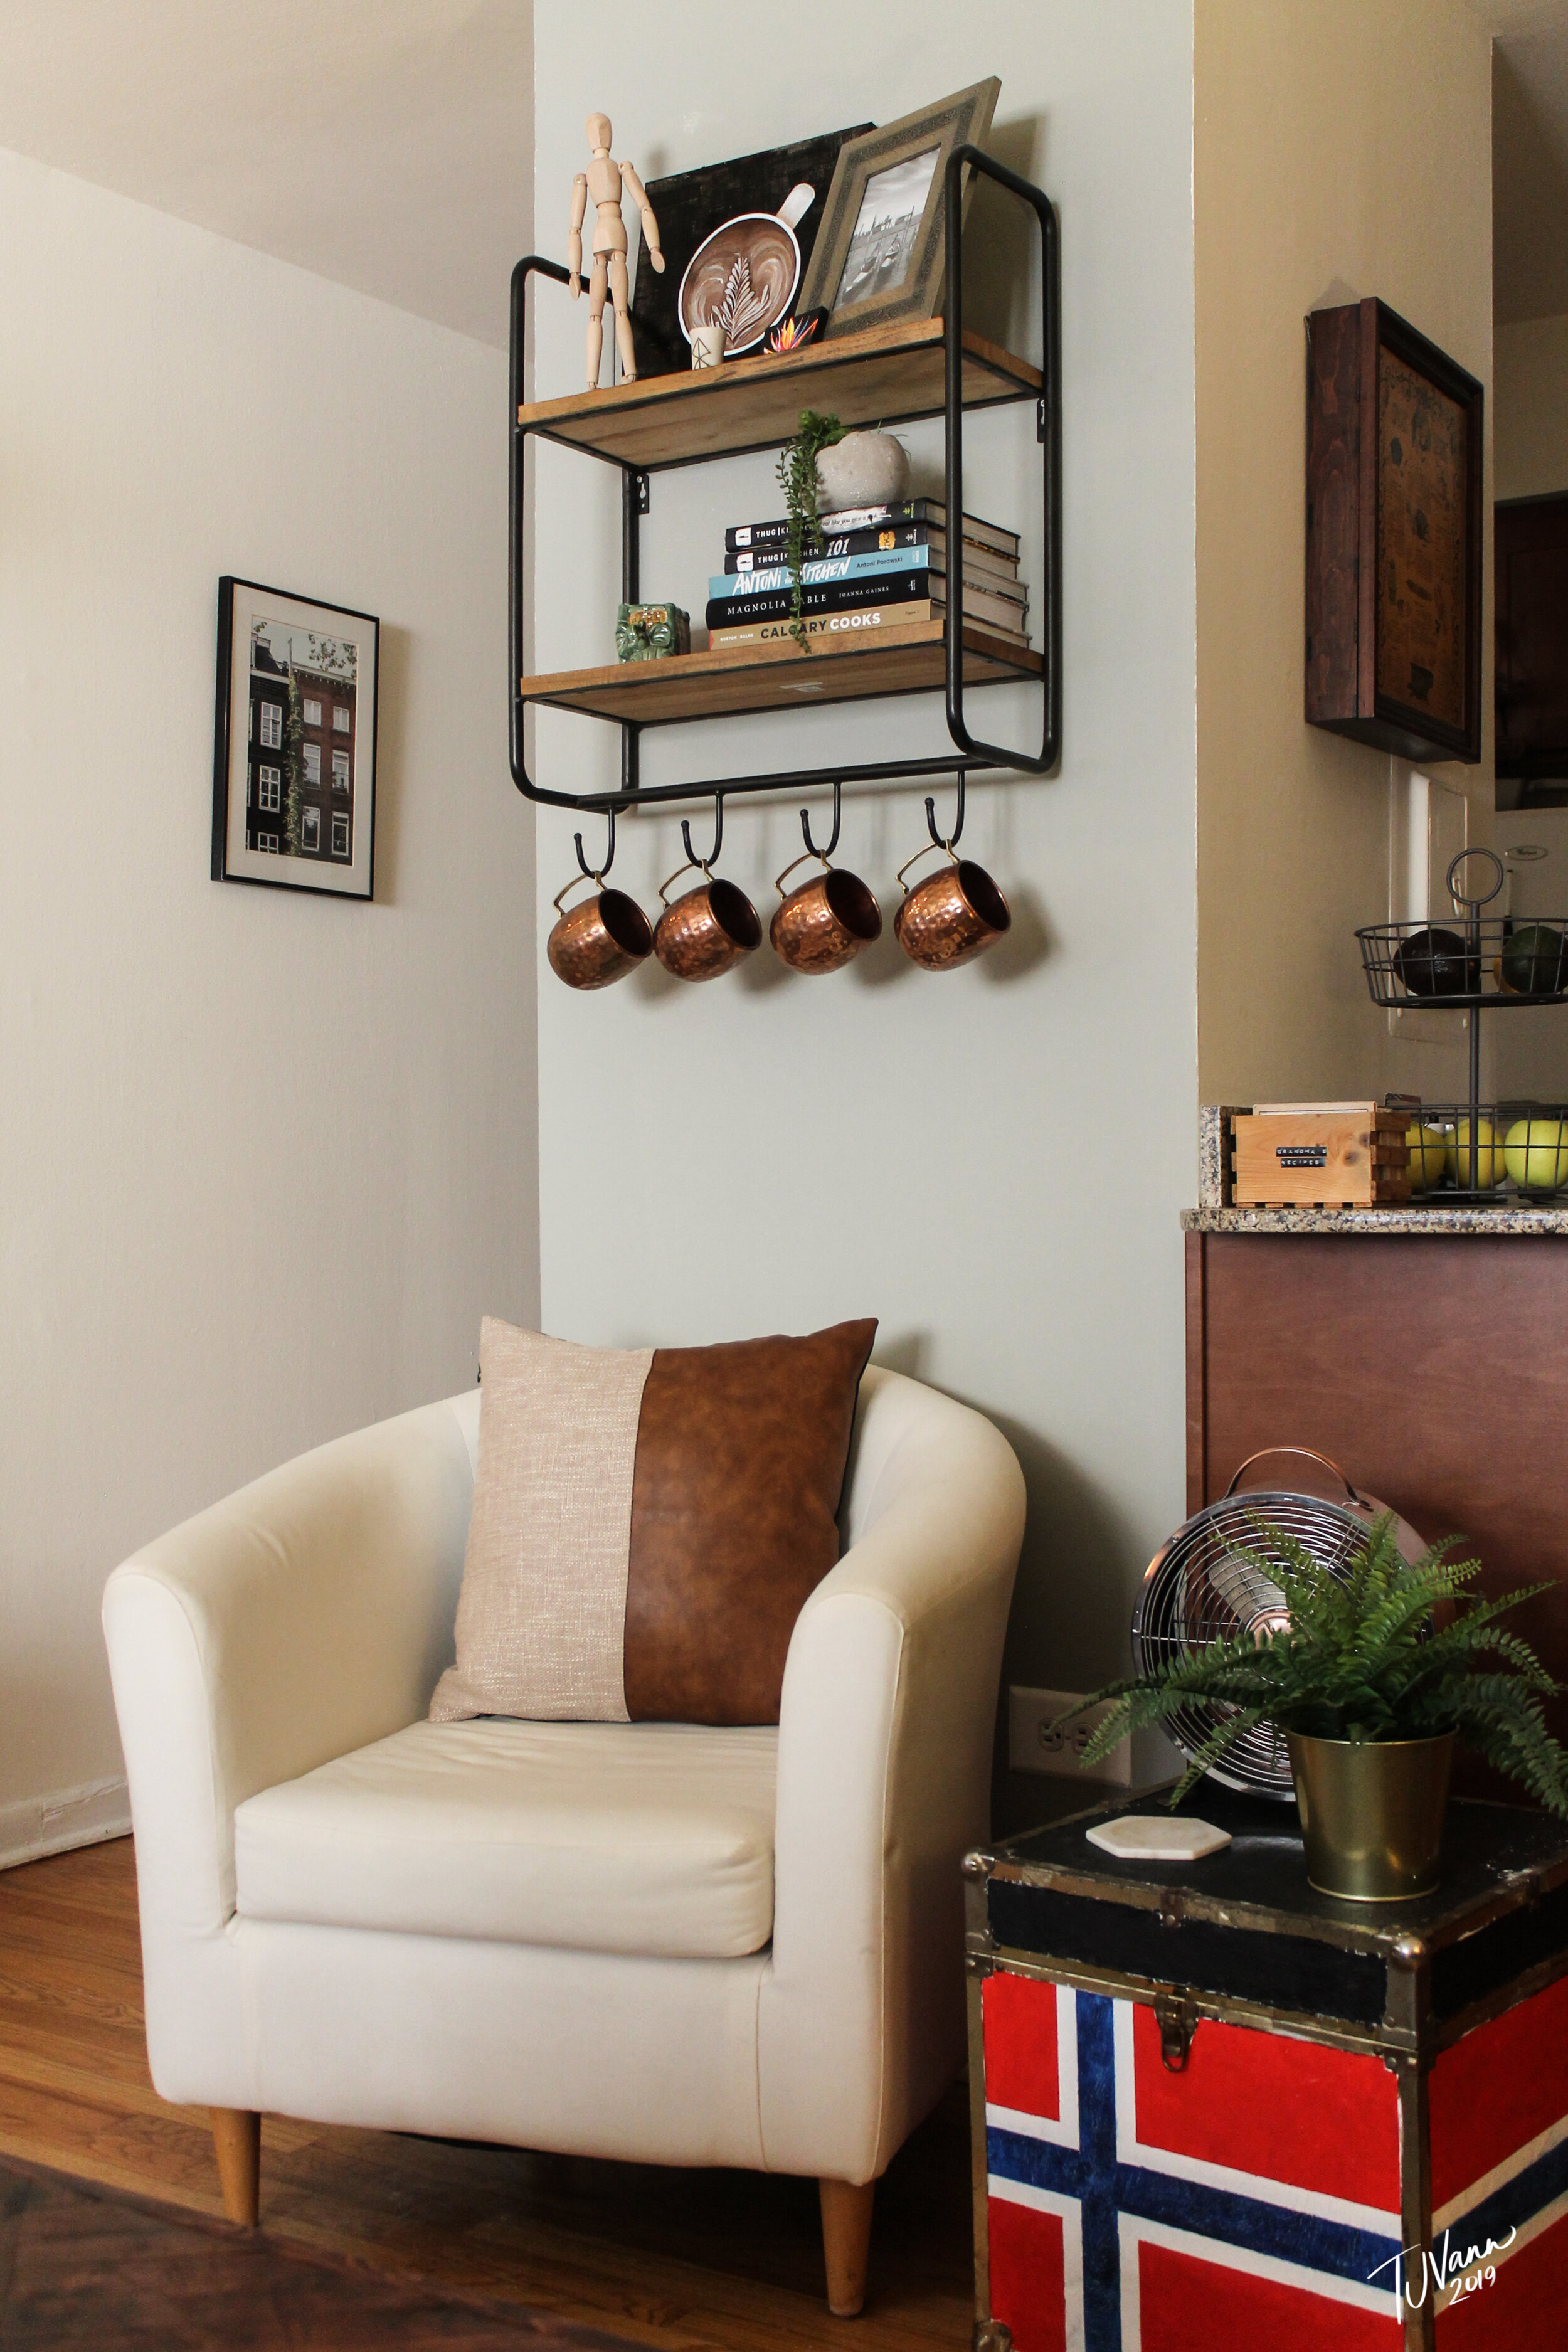
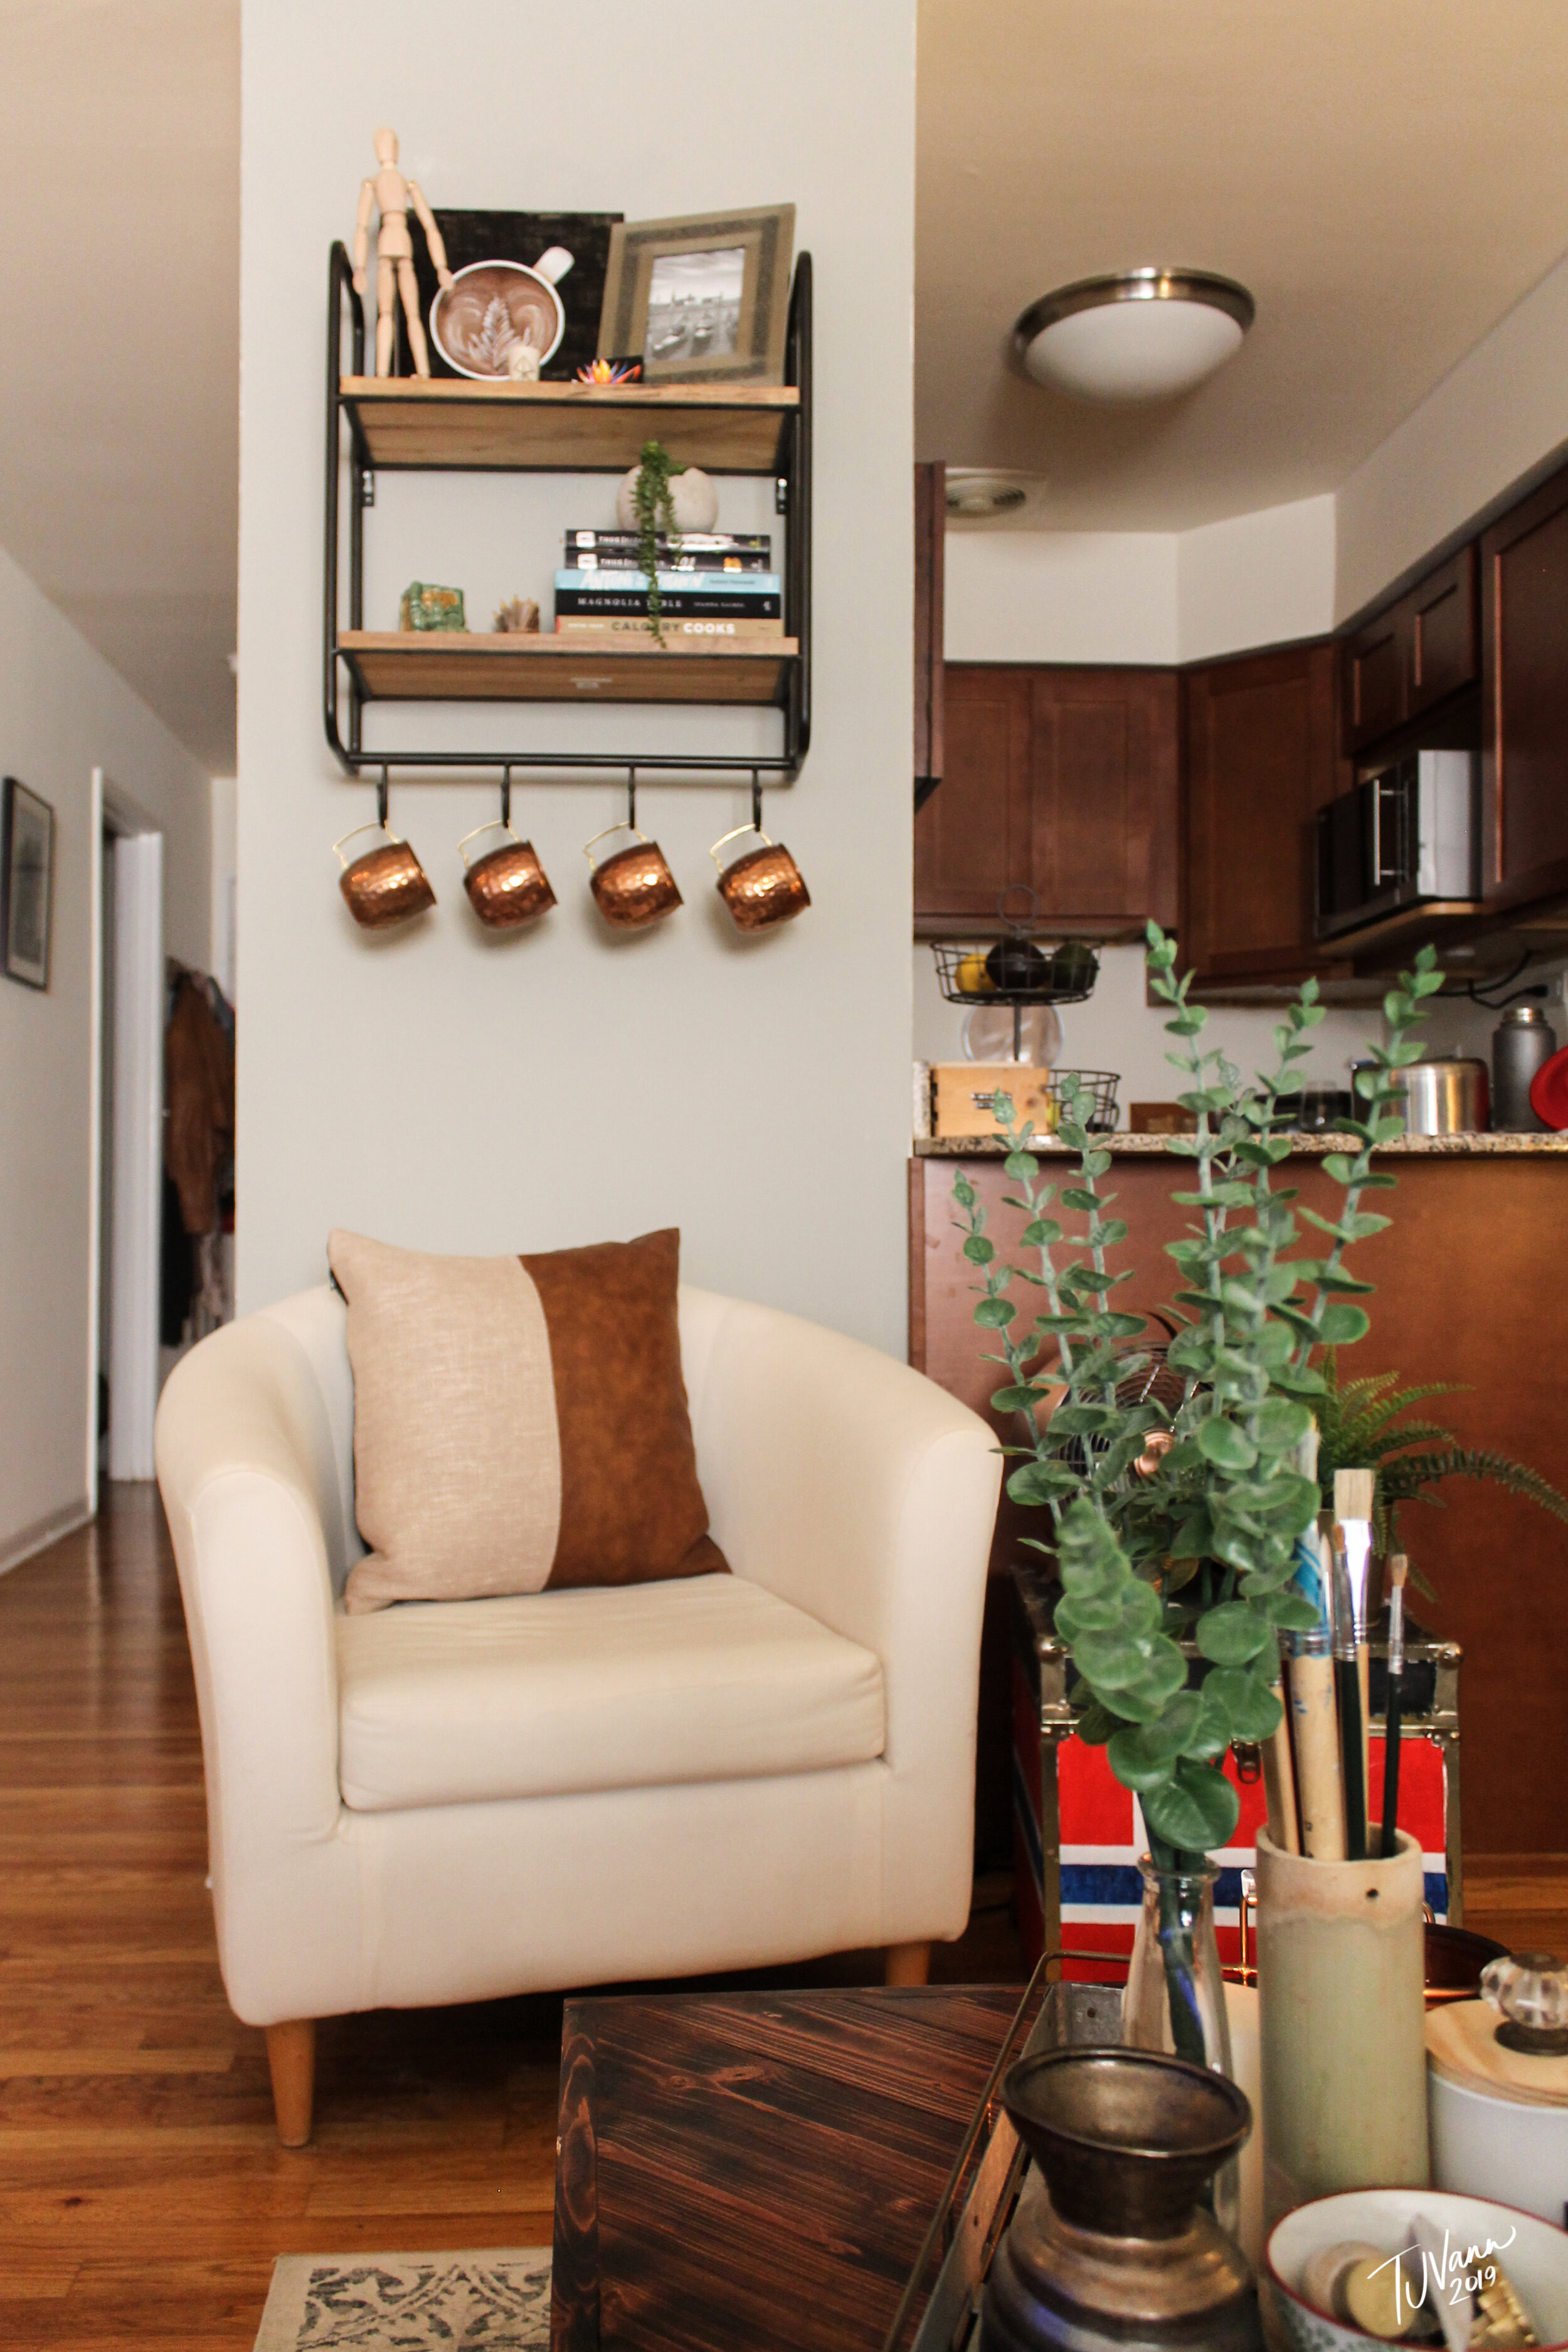
Next, decide on your wall colors. If your space is small, or if it’s a shared space with another room in your home, you’ll want some continuity so that your workspace isn’t out of character with the rest of the living area. In those cases, neutral colors tend to work well (and can help you focus); you can add colorful accents to personalize your workspace more.

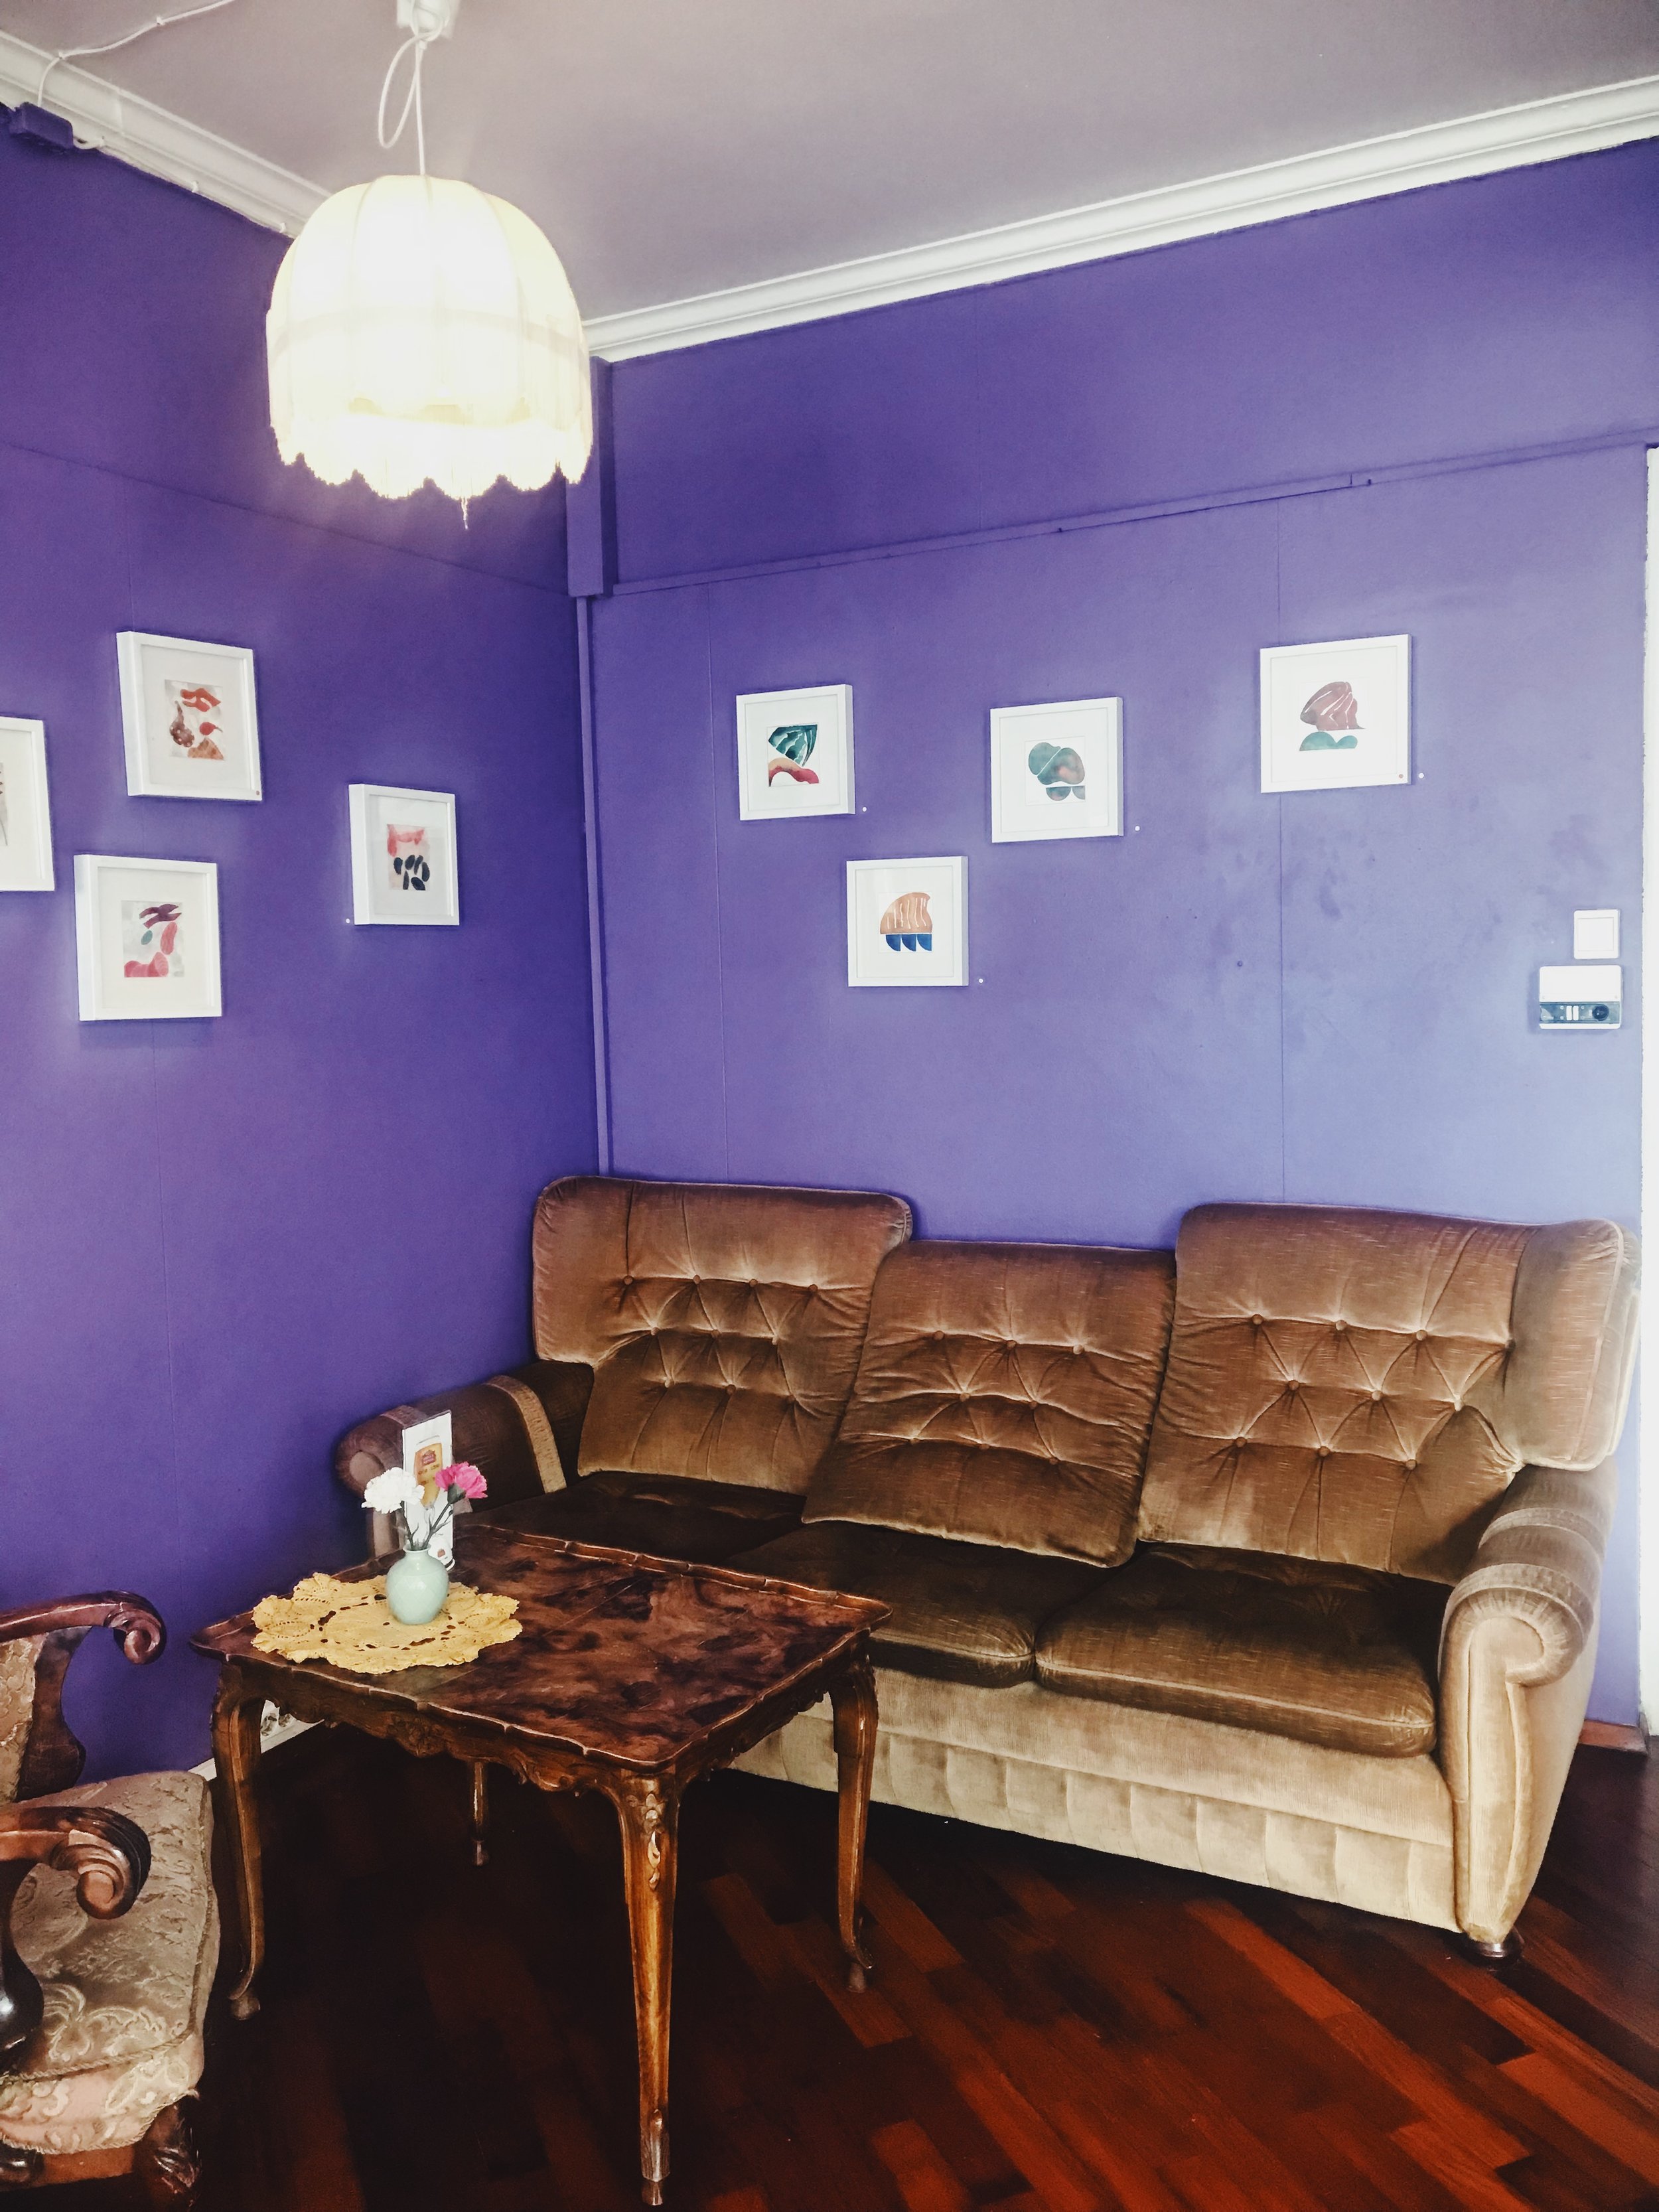
However, if your office is a separate room, there’s nothing to stop you from expressing yourself with some wall color – and the great thing about painting is that it can be done relatively inexpensively. Dark blue can help offset computer screen glare, green can add warmth, orange and yellow can be energizing, and even black can create a calm space. If you’re not too fussy about shades, go to your nearest home or paint supply store and ask if they have returned cans that they will sell at a discount.

Photo by ergonofis on Unsplash

Photo by ergonofis on Unsplash

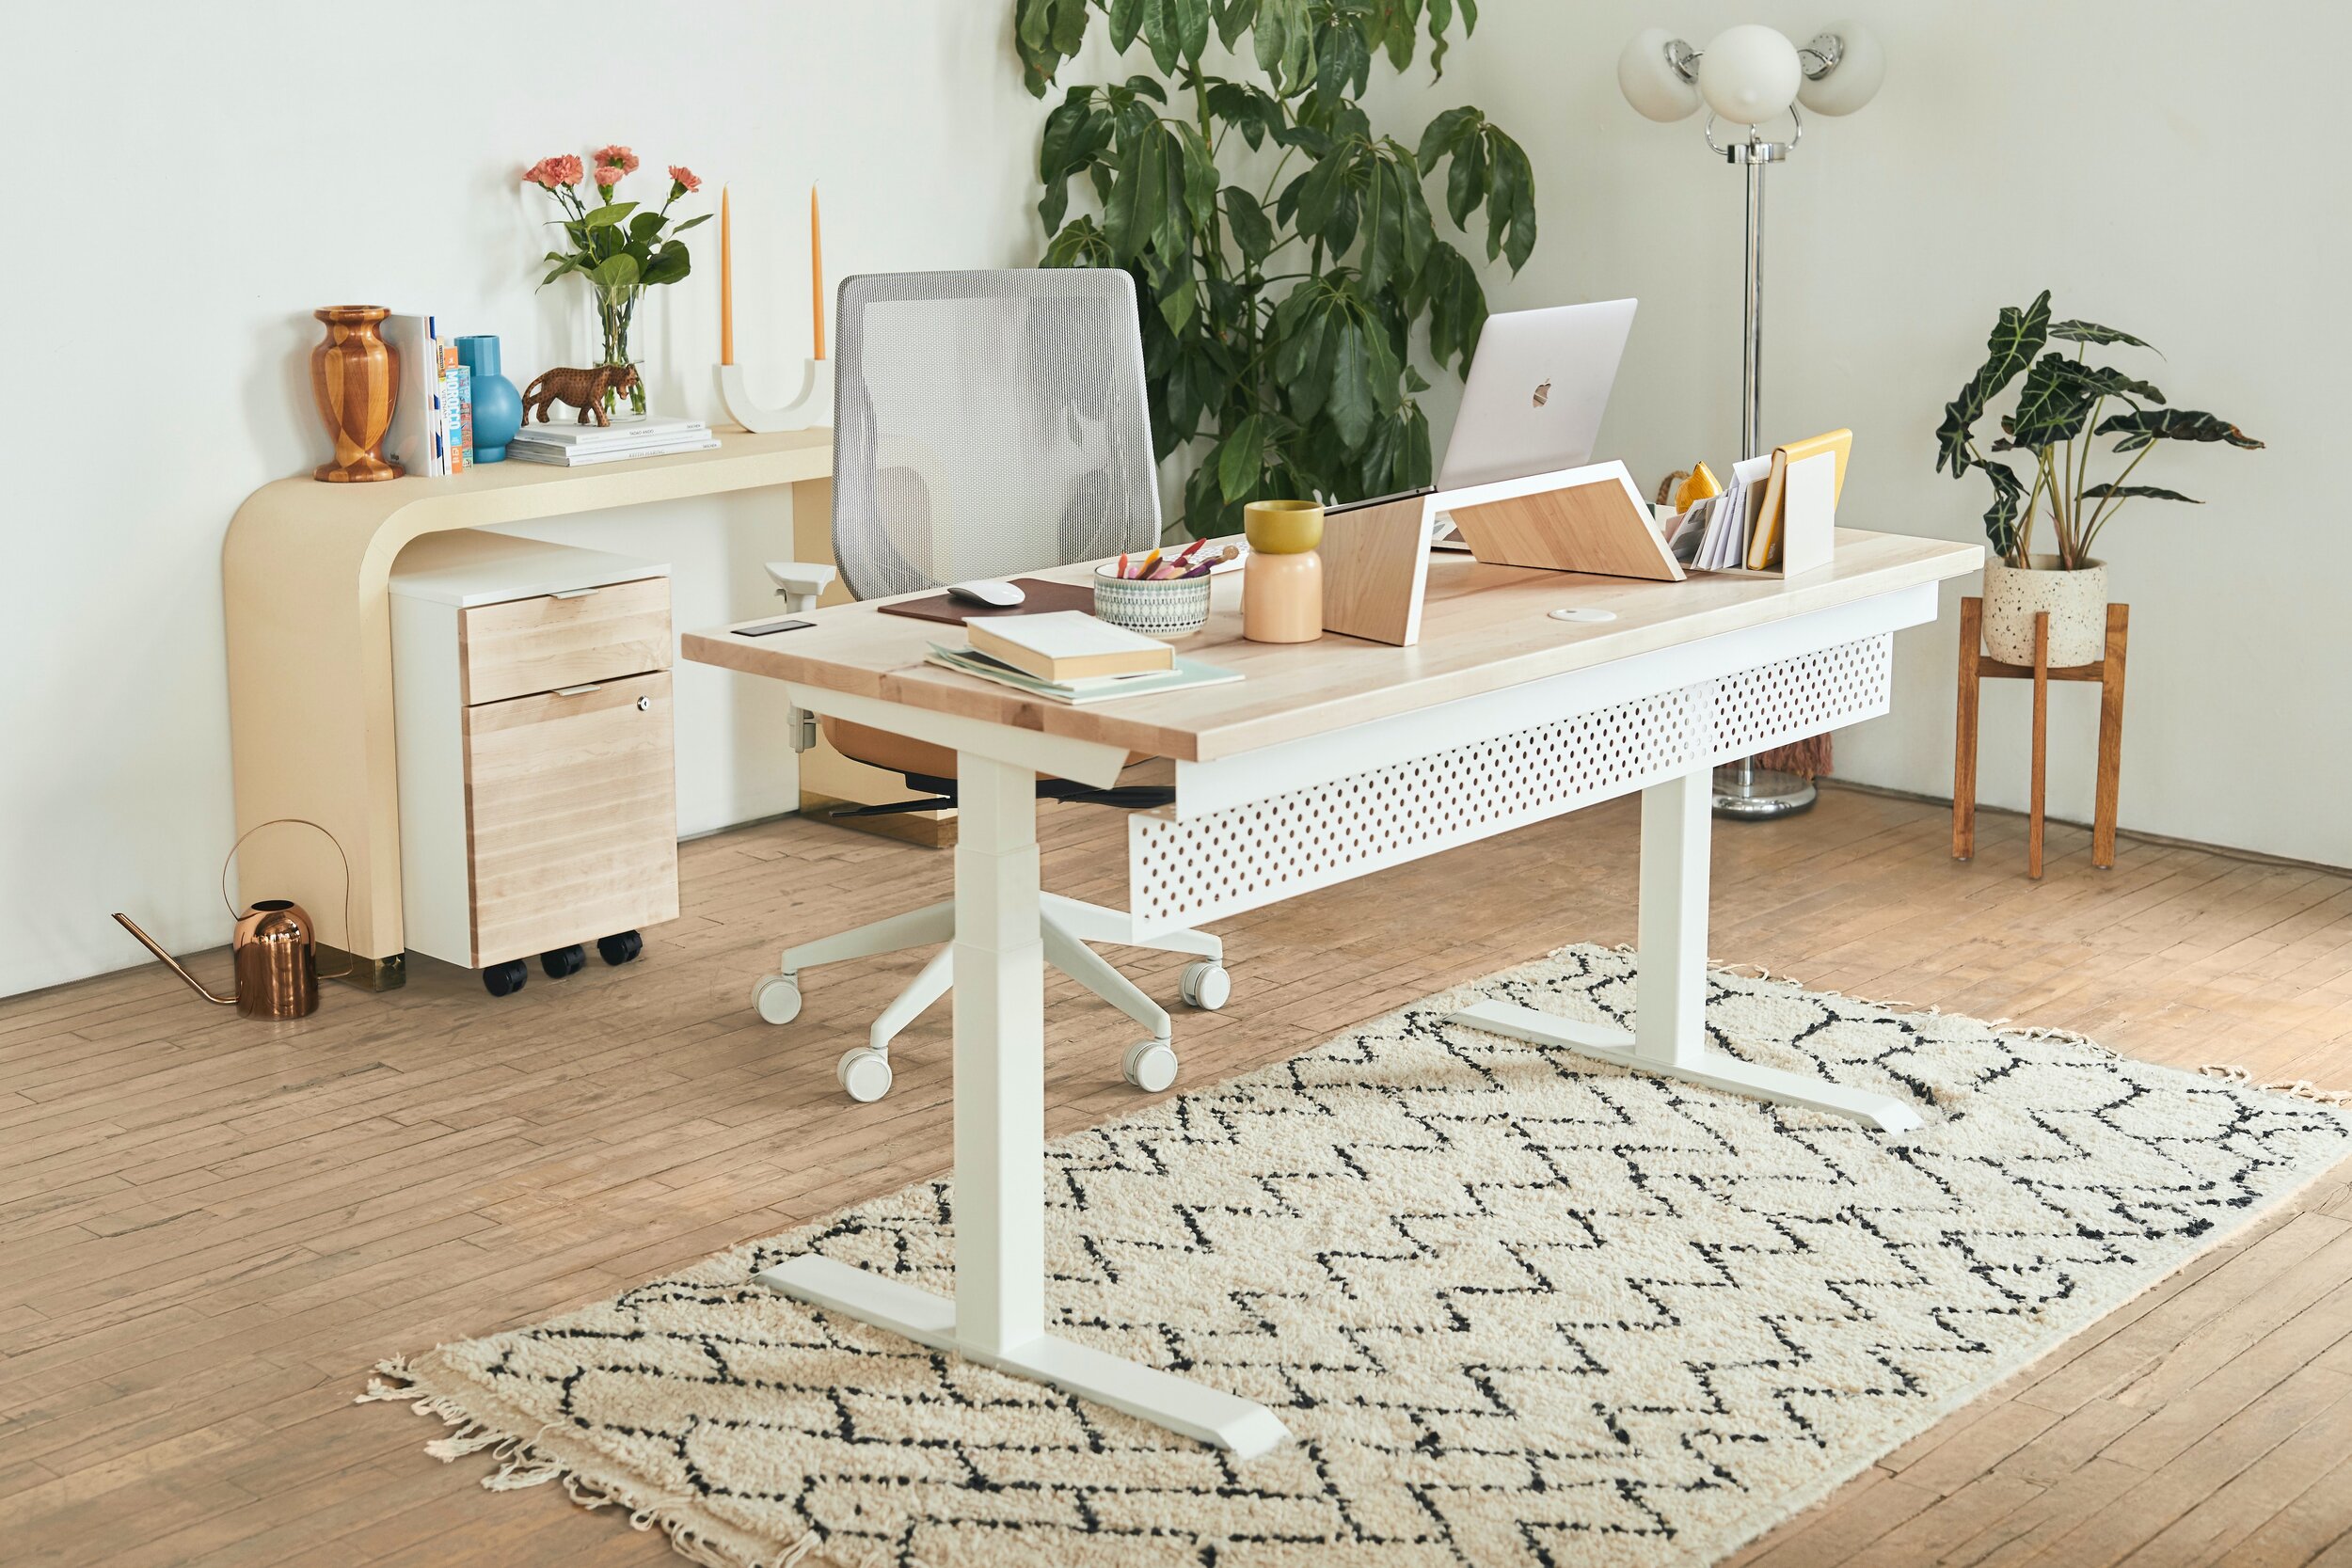
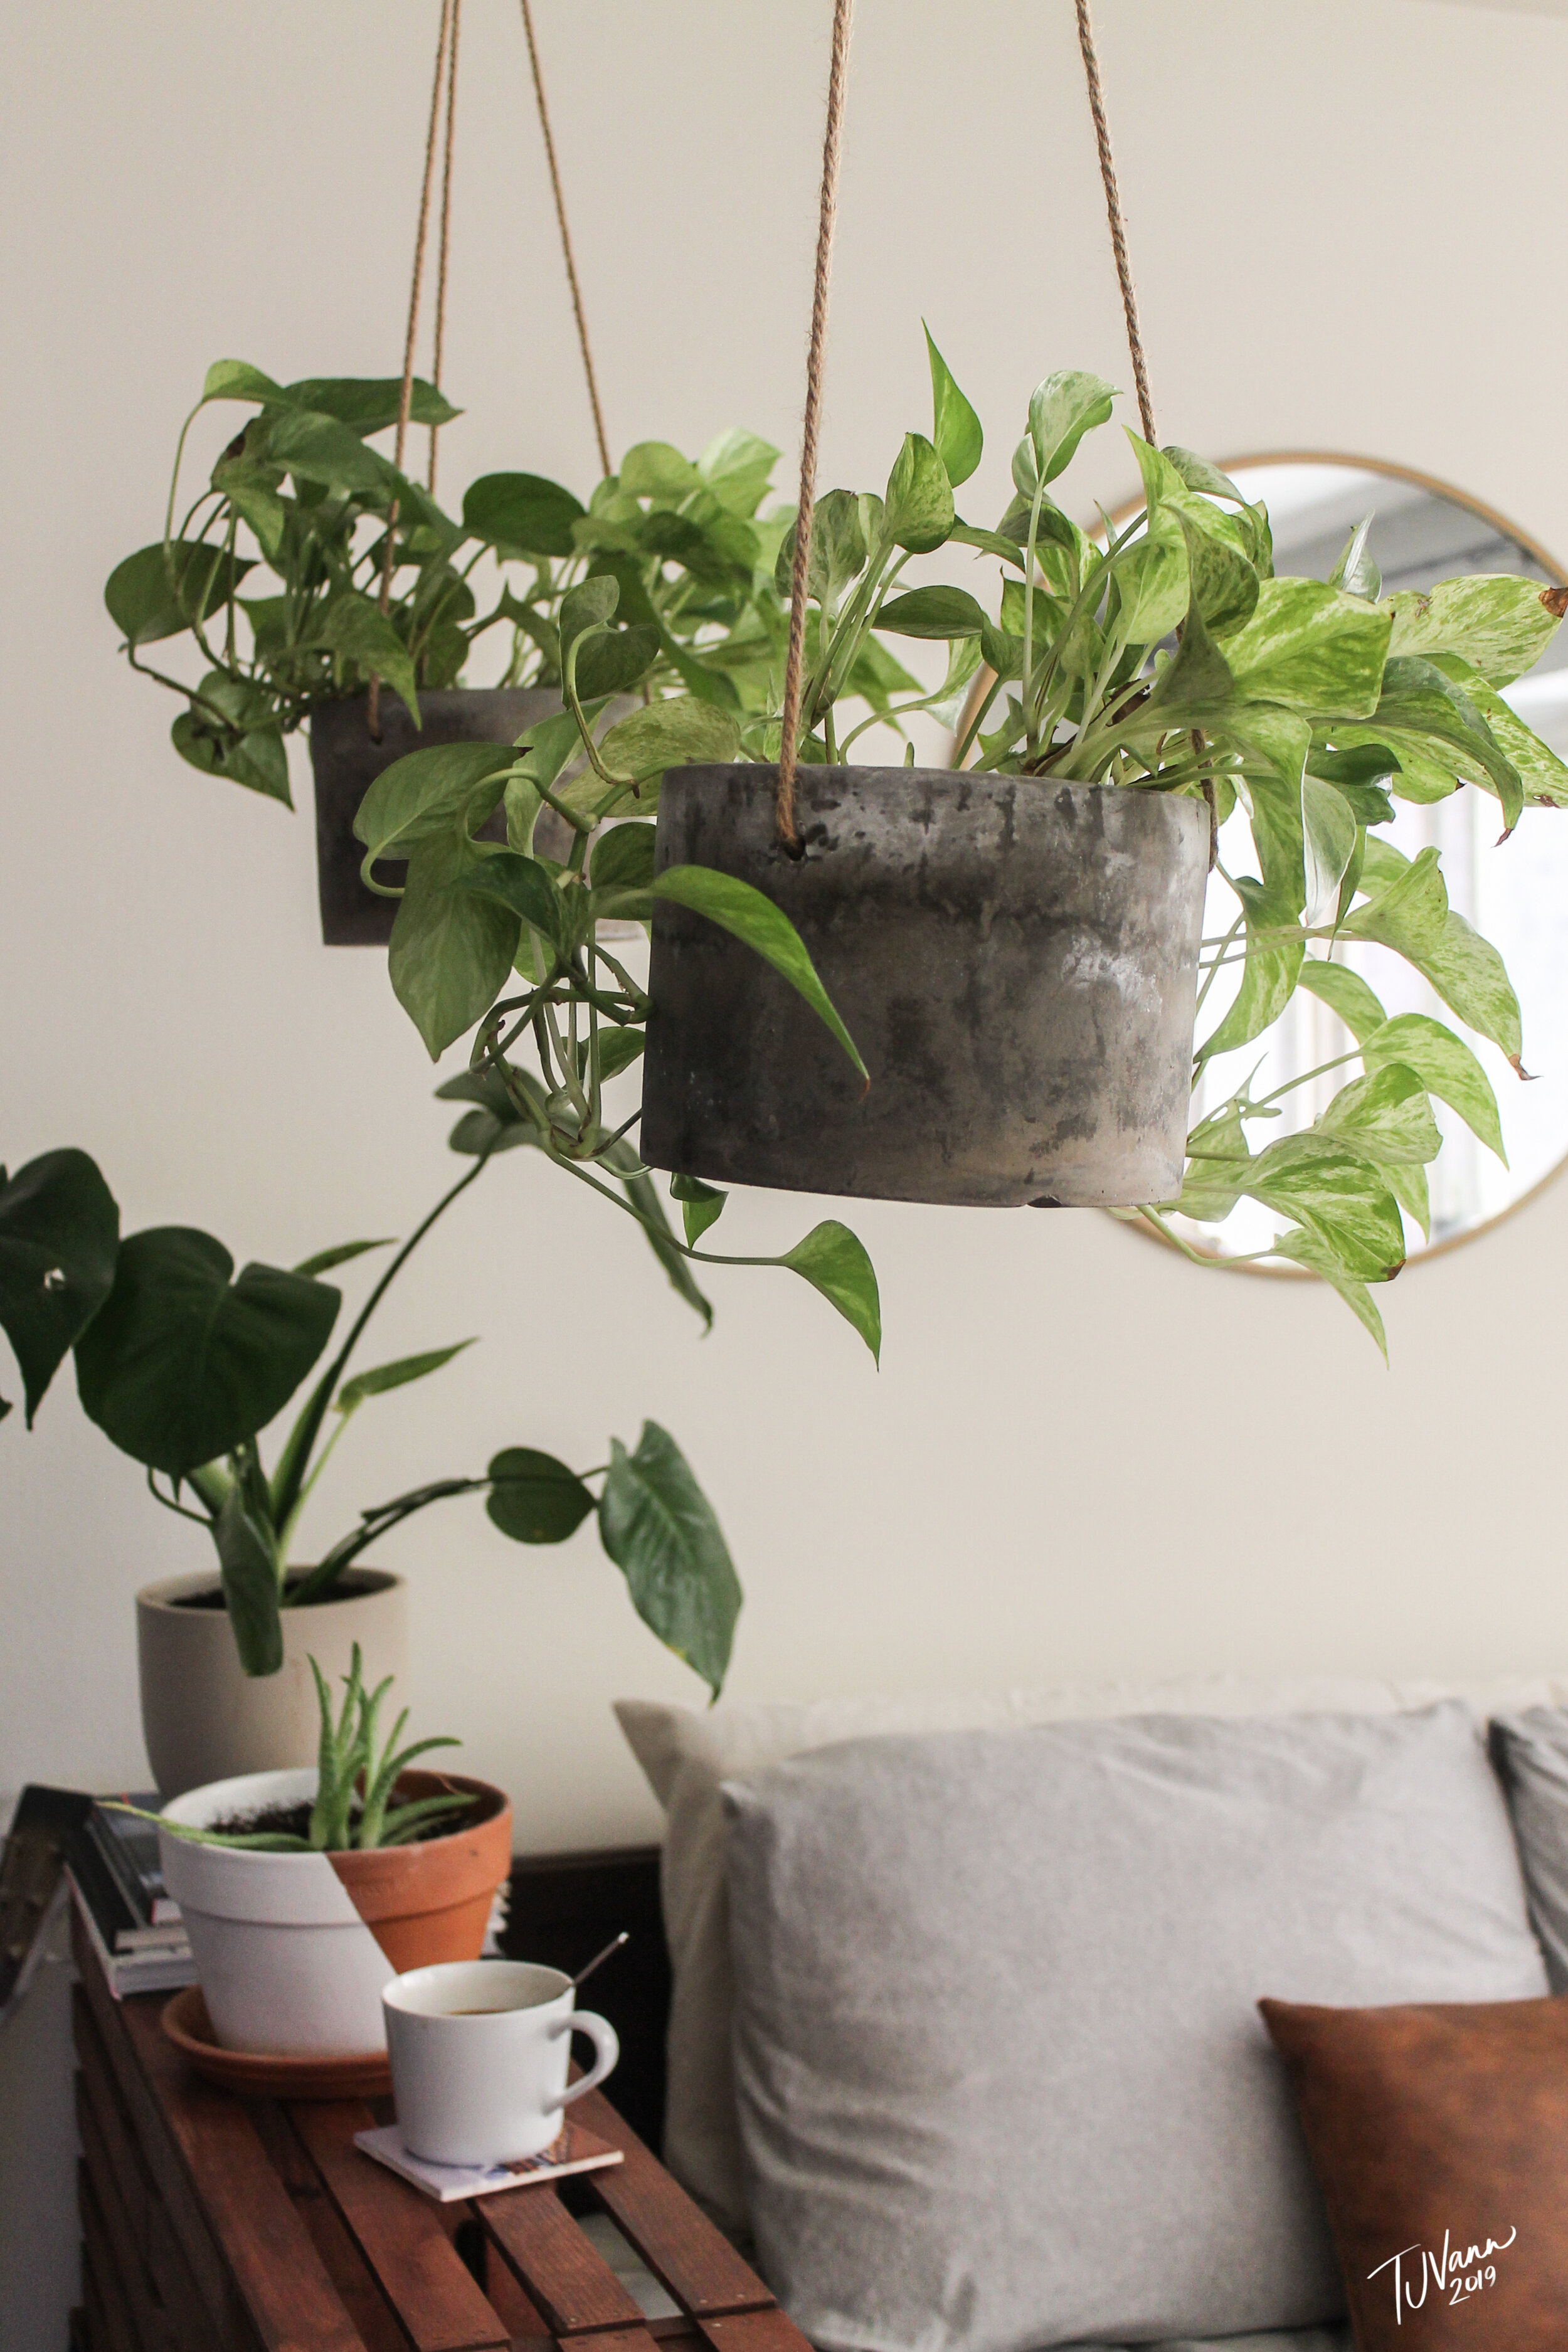
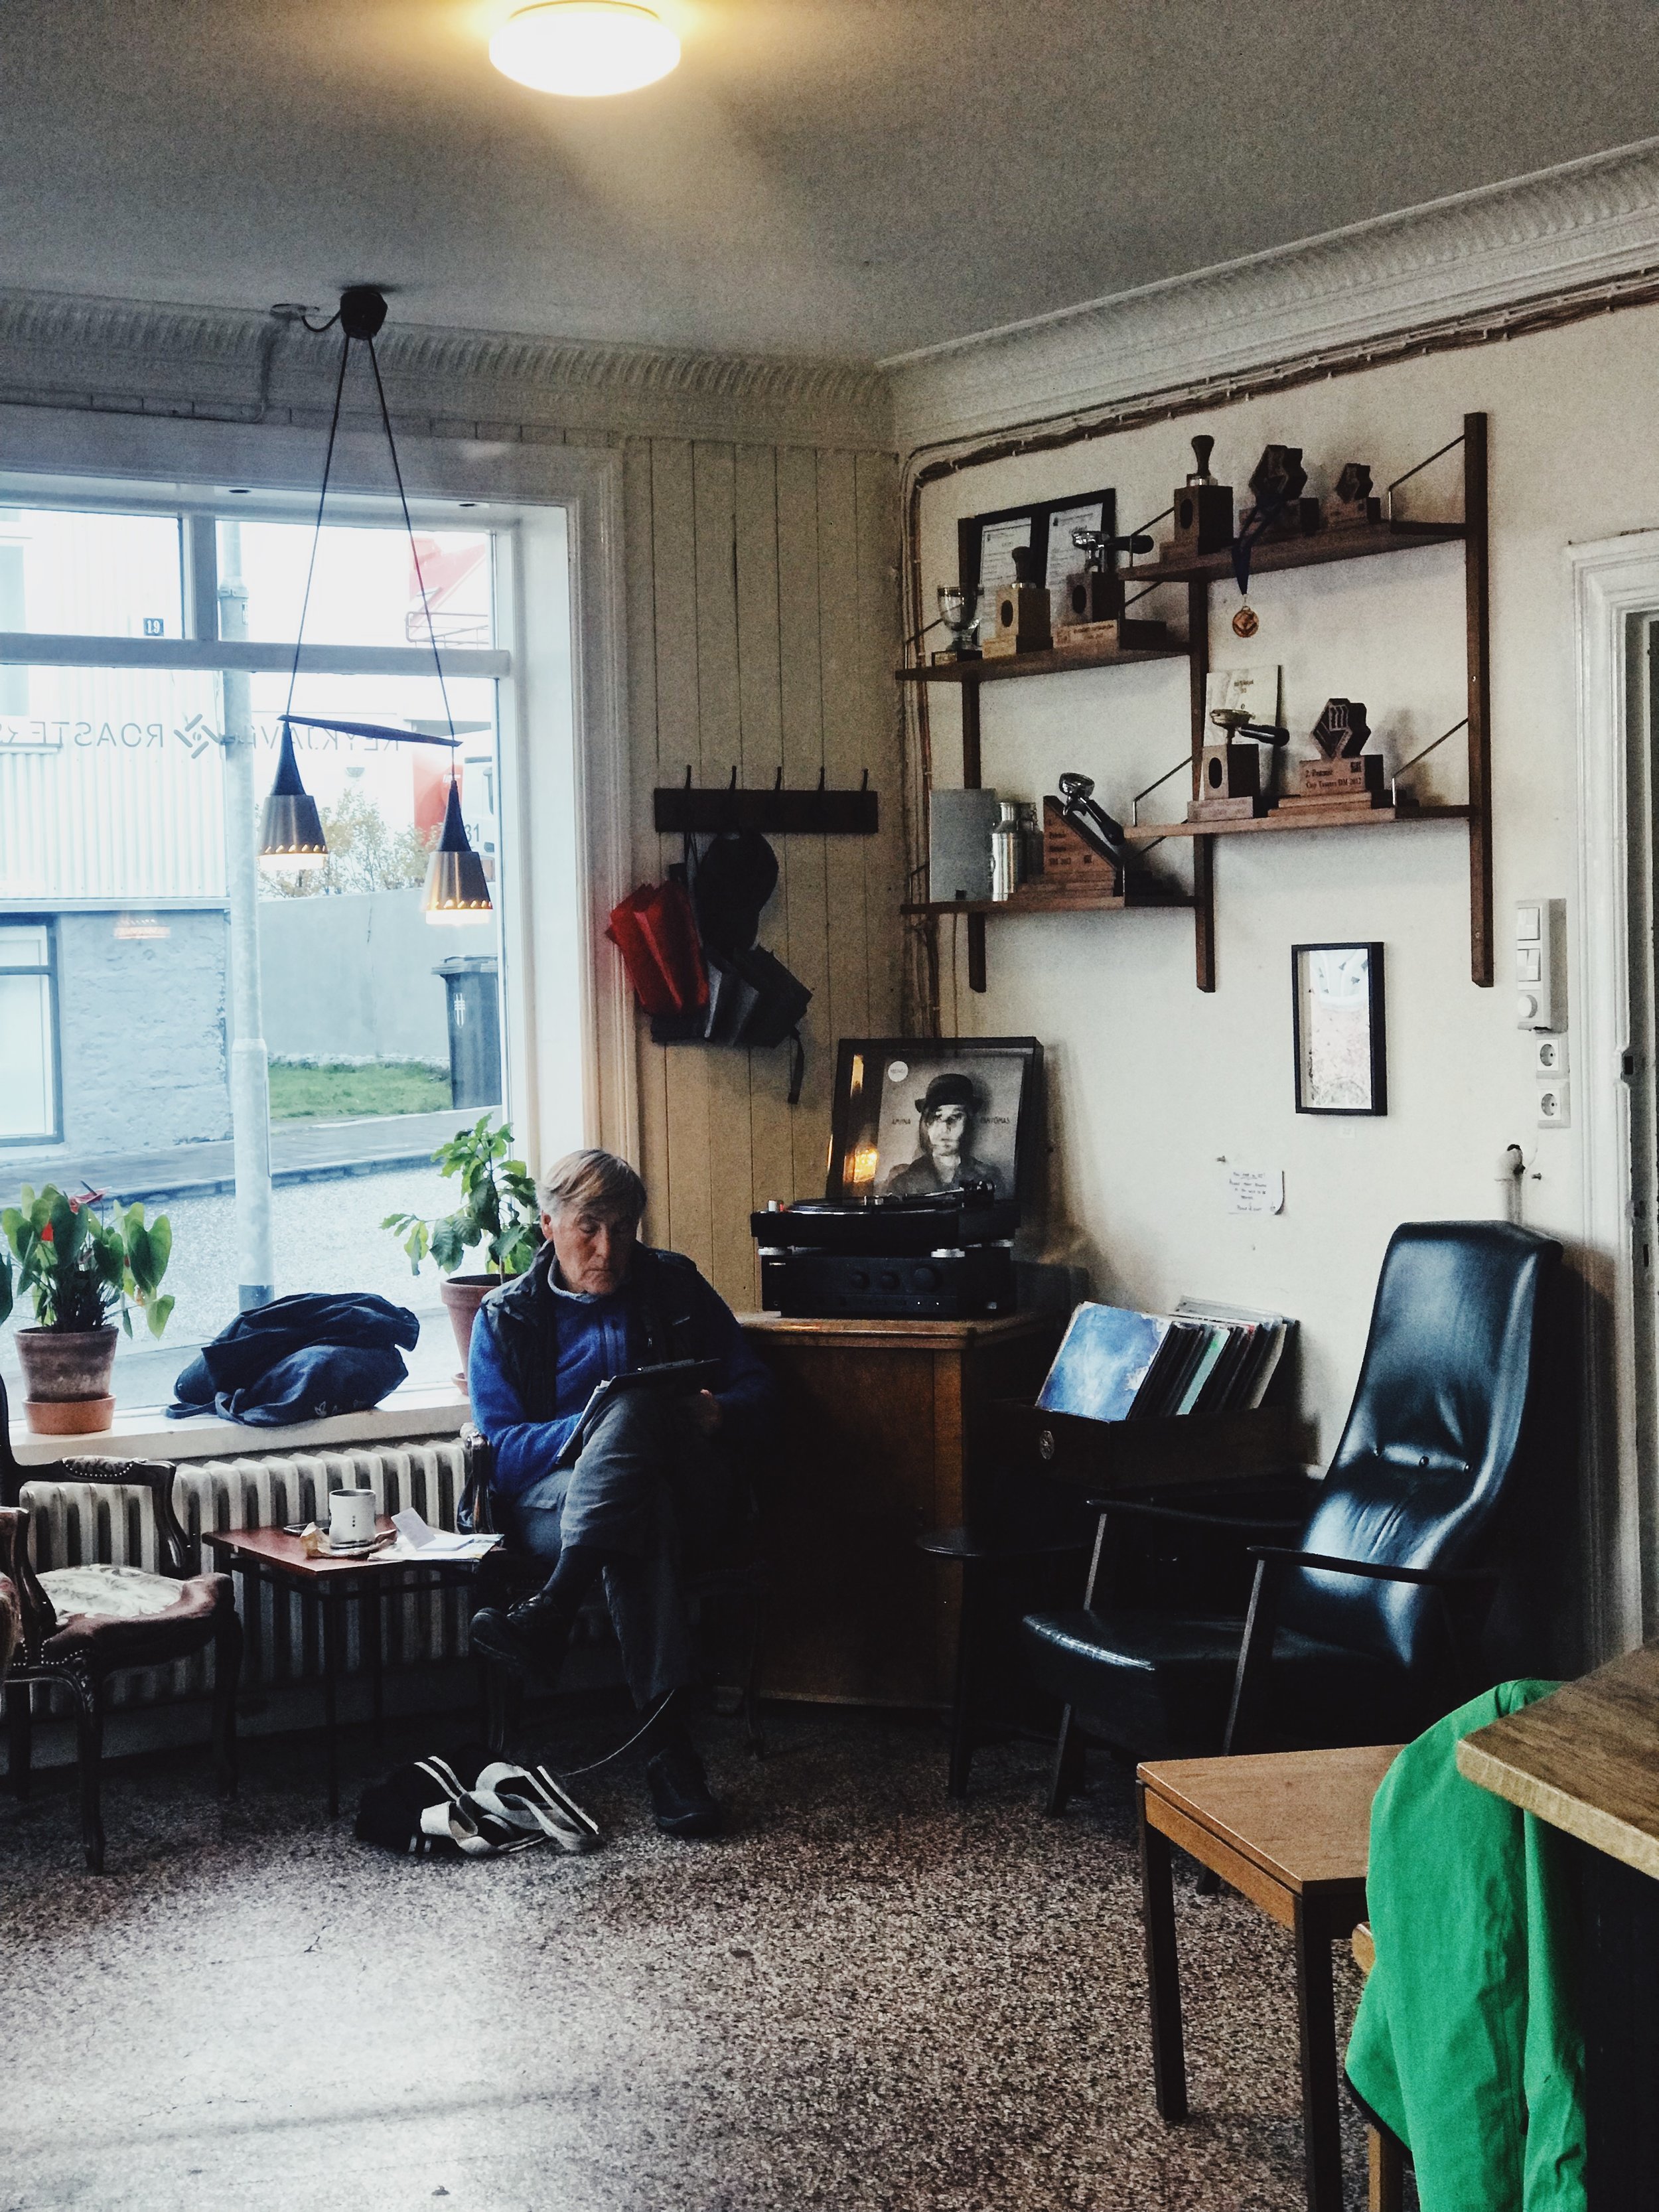
One item you can add regardless of your decorative style is greenery. Plants can add an instant facelift to your workspace, and there are plenty of hardy, easy-care options available that thrive in low-light settings and don’t need constant watering. Remember that if you have a dog or cat in residence, you’ll want to stay away from any plants that are harmful to them.

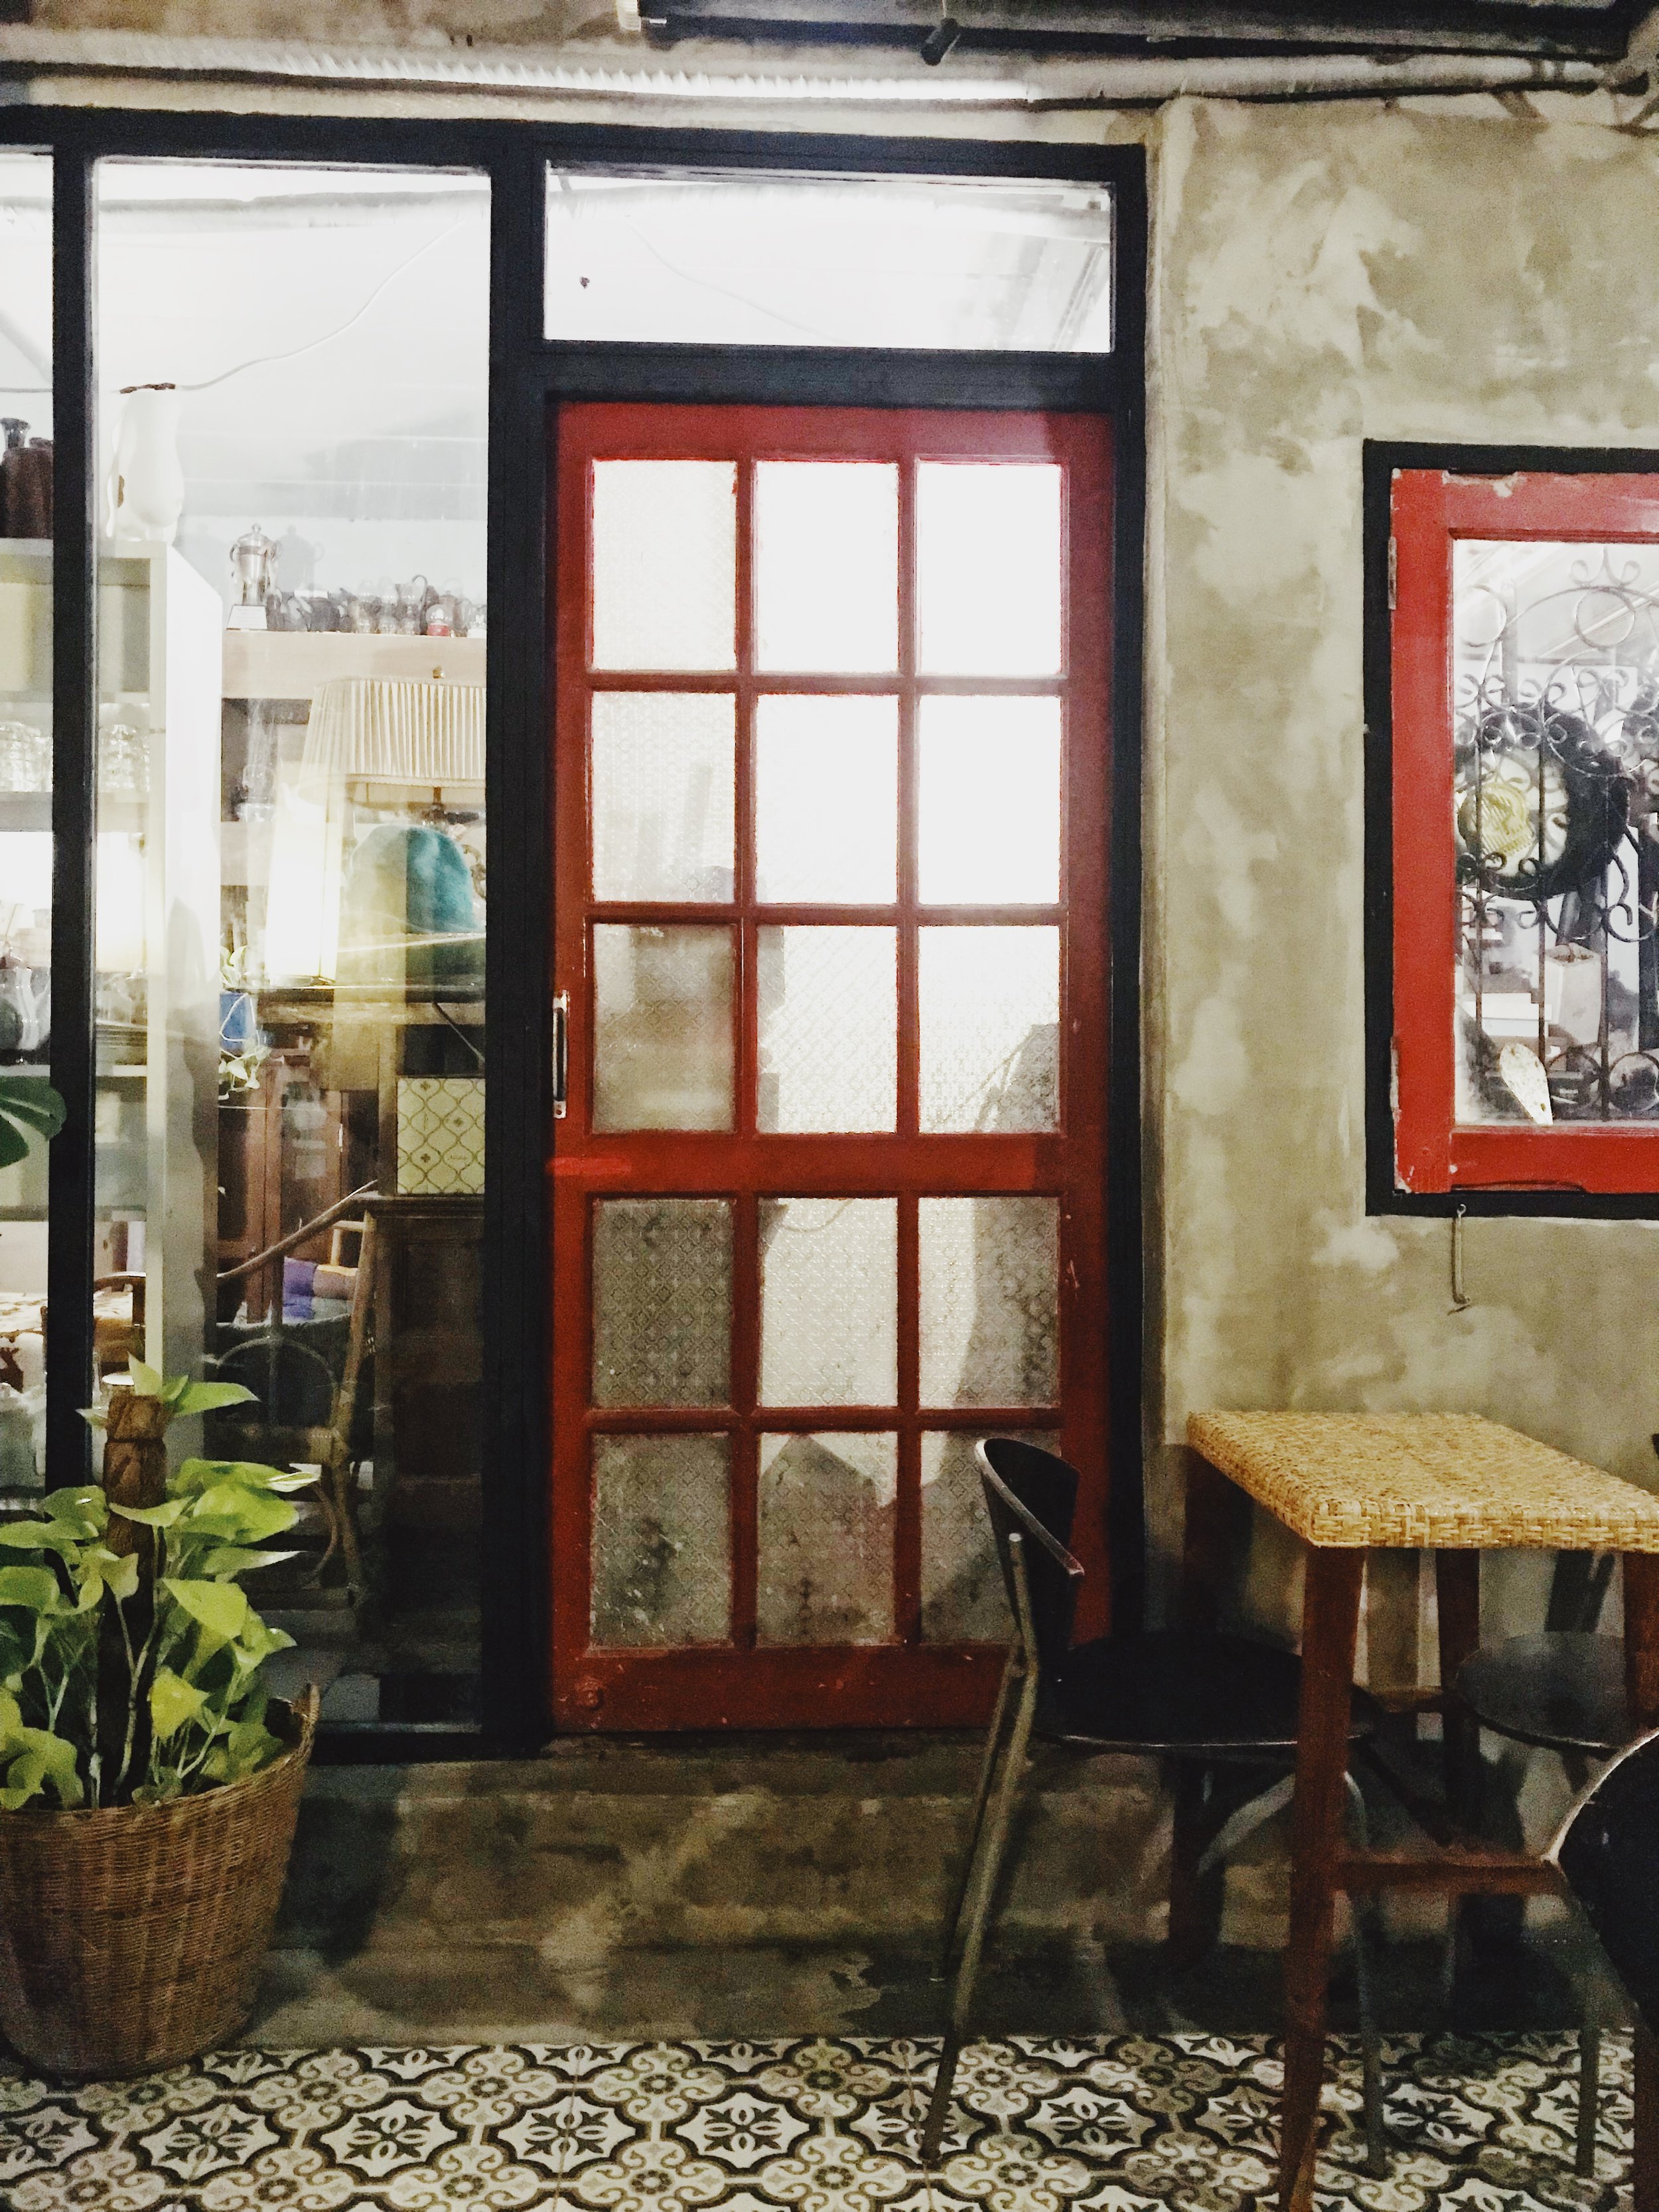
The other item you may want to invest in is some lighting. Whether it’s changing to energy-efficient bulbs, or adding a dimmer function so that you can adjust your light as it suits your mood and workload, lighting can be a game-changer. If you have the option of increasing the natural light that gets let in, do it! This could be as easy and inexpensive as changing your window coverings or, if you have a door leading to the outside, replace the door style with one that has a glass front. You’ll notice a difference in your mood and your productivity.

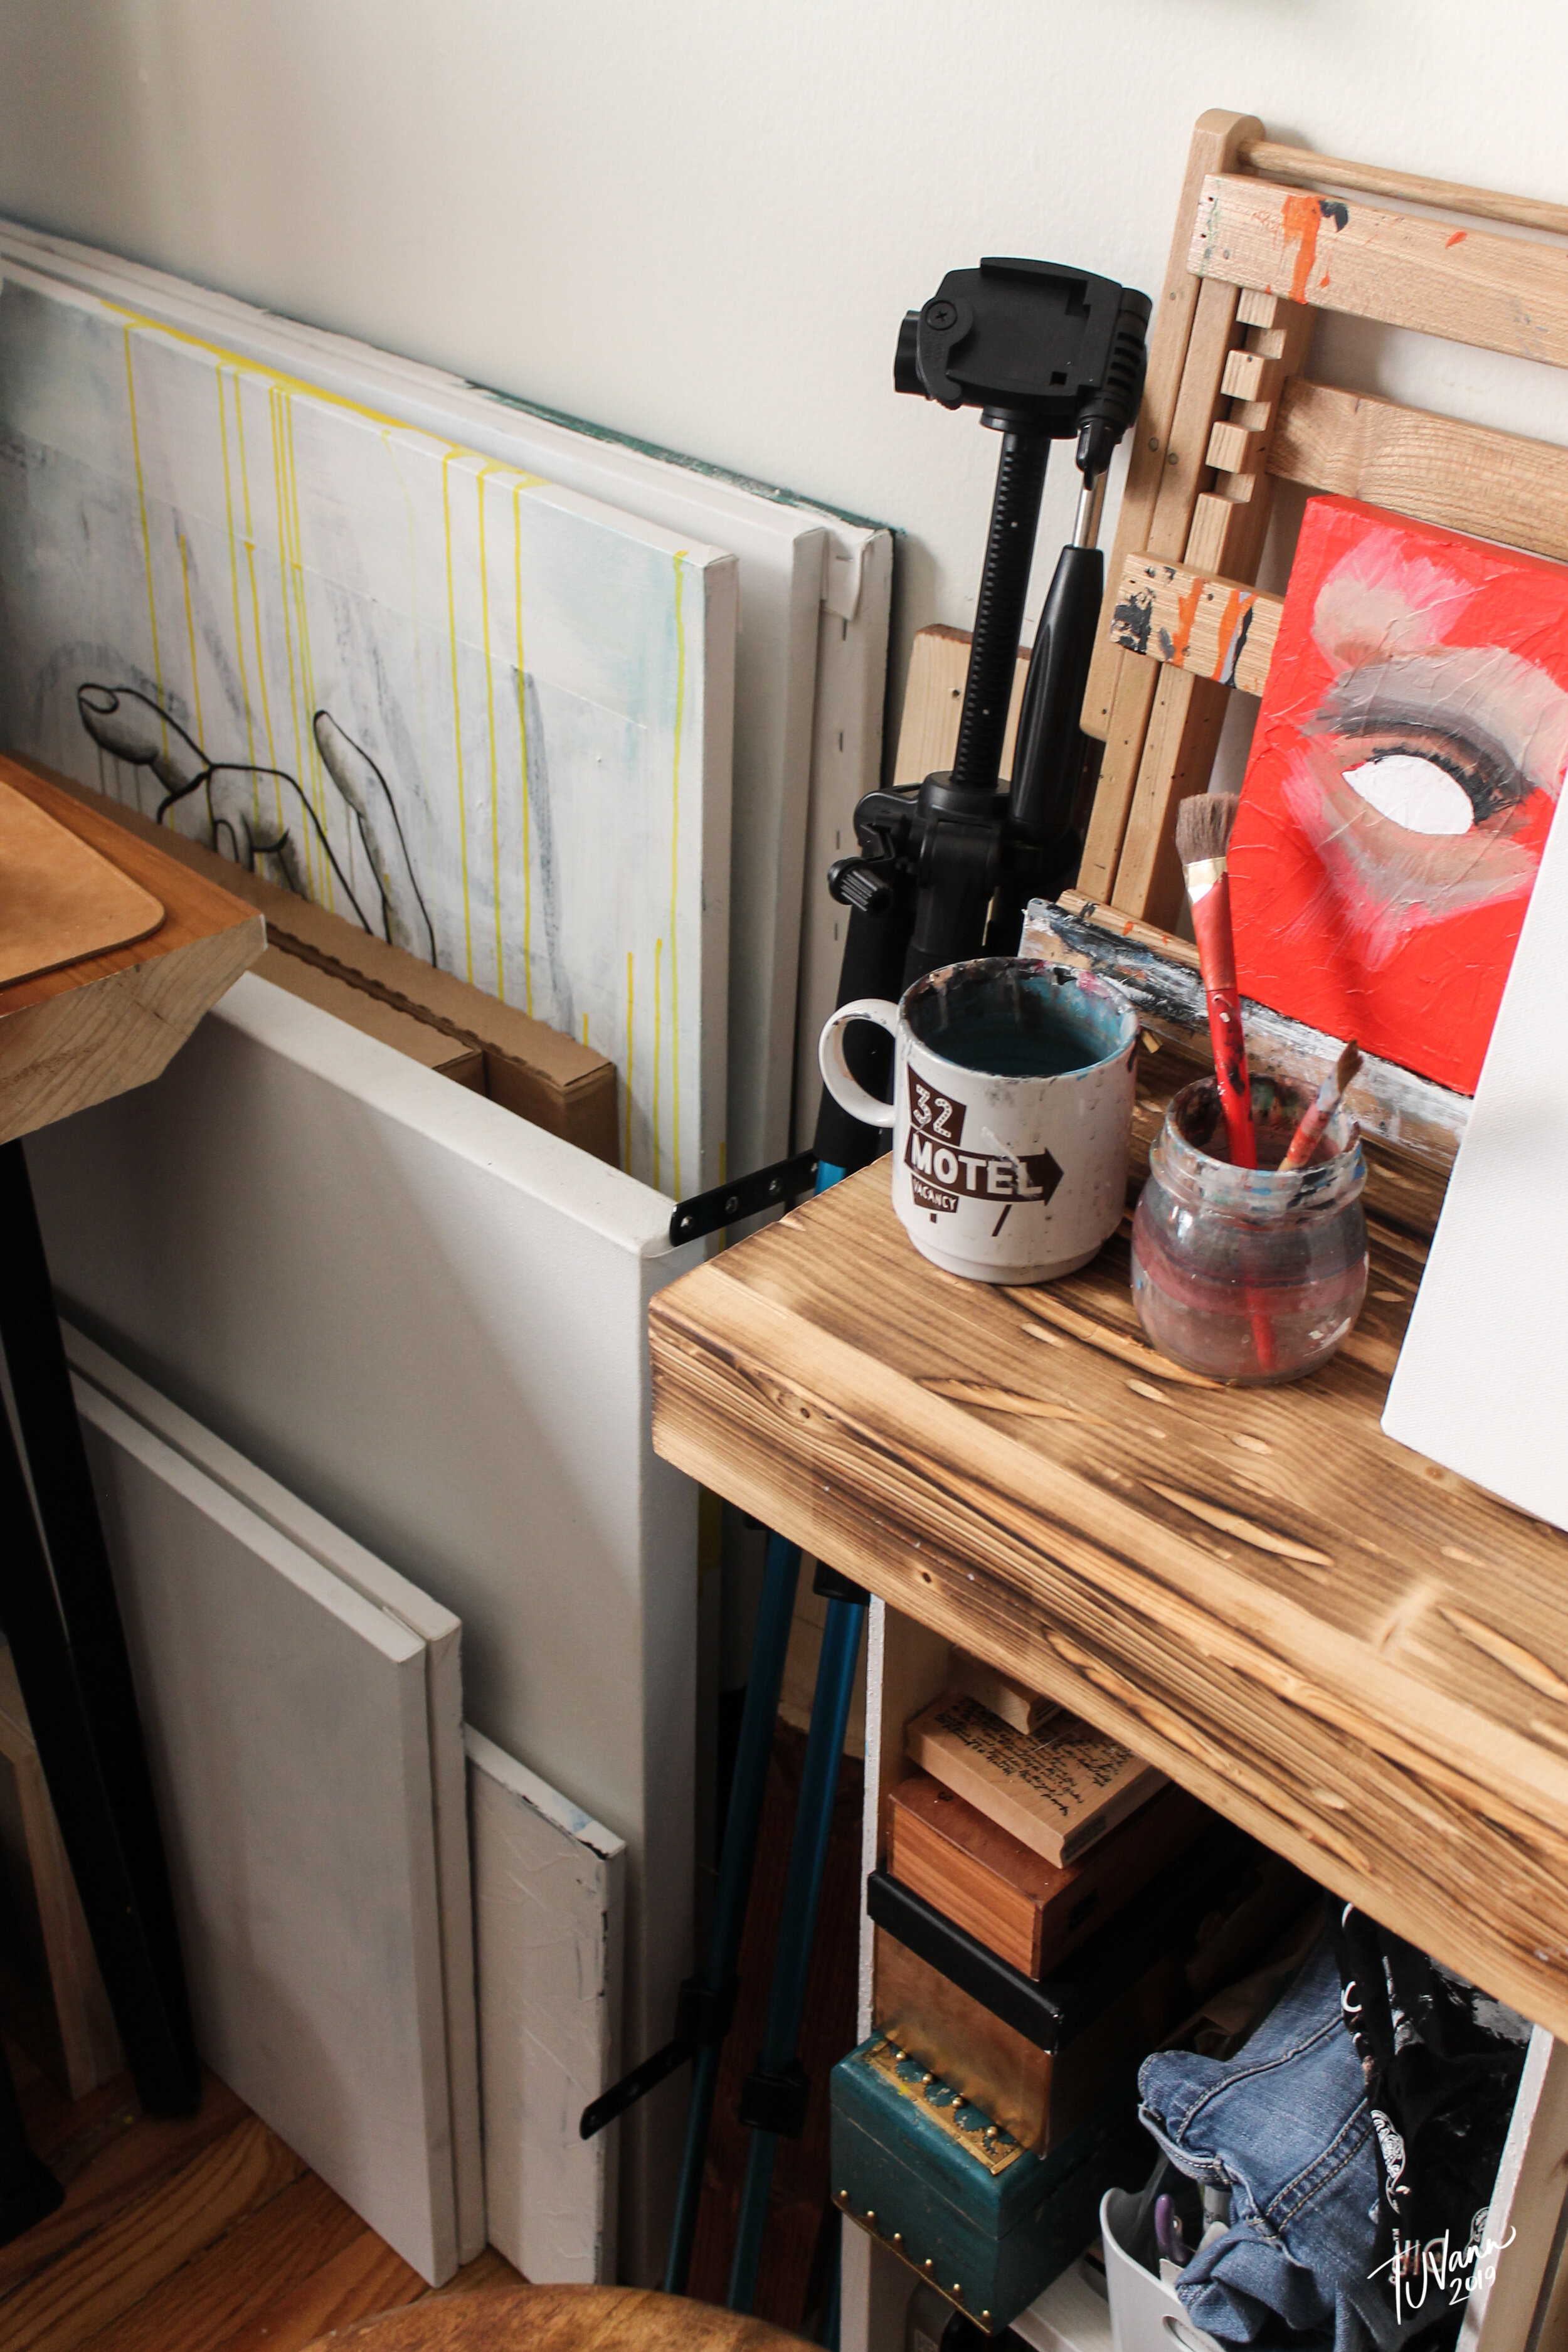
Finally, don’t forget your wall art and other décor. Adding a large piece appropriate for your wall space can provide a wonderful focal point and immediately change the room’s ambiance. Check out the selection of affordable prints and framed art at TJ Vann Art for the piece that can either help you build your workspace, or put the final touch on it.

Doing the re-dos

If you can afford to buy all new office furniture, great! There are a lot of ergonomic yet tasteful options to choose from. However, if your budget is tight and you have to make do with your existing furniture, invest in an ergonomic chair or standing desk (if you haven’t already), and look at how you can breathe new life into your existing furniture.

While your paint brush is out for your walls, take a look at what furniture you can paint to give it a facelift. If this task is new to you, you’re sure to find some video or other step-by-step instructions on a few social media channels.

If you already have a comfortable overstuffed chair or area rug, give them a good cleaning to revive them. If you don’t have them, take a look at some secondhand shops, or even flea markets or garage sales. Don’t let a stain or two deter you from an ideal piece, or from keeping your old ones; instead, do an online search for “upholstery cleaner near me,” read the reviews for the ones that come up, and ask them for customer referrals. Be sure to describe your pieces to them, and stay away from any that use all-in-one cleaning tools.

Be inspired!

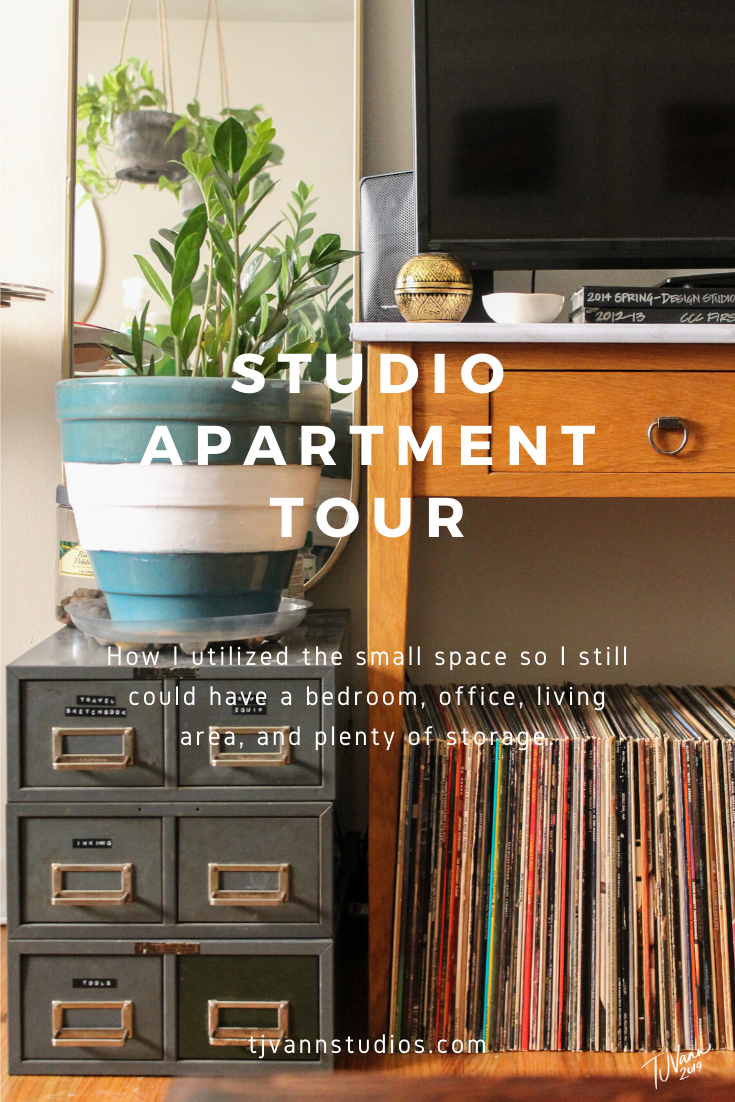
If you know you want to make a change in your workspace but can’t summon the inspiration to start, check out some ideas to inspire creativity on the TJ Vann Art blog. Remember, your workspace should be one that you enjoy spending time in – that helps make work seem like a natural extension of your life, rather than a separate, unpleasant task.

About the Author

A few years ago, burned out and miserable from his job in corporate marketing, Lance Cody-Valdez decided it was time to invest in himself. He quit his job the following day and used his meager savings to stay afloat as he built a career as a freelance writer and content marketer. He created free-lance-now.com to help others use freelancing to escape the 9 to 5 daily grind.

Free-lance-now.com

How I Designed My Small Studio Apartment

(This blog post may contain affiliate links. If you click on one of my affiliate links and make a purchase, I may receive a small commission for referring you. This comes at no additional cost to you. Please note I only offer resources that I have used and strongly recommend!)

For about a year and a half, I have been anticipating this blog post… and I feel that I am finally at a point where I feel ready to share how I set up and designed my 500 square foot studio apartment in Chicago.

[ click images to enlarge and scroll through ]

This is the very first apartment that I have lived in by myself. I moved in Spring of 2018 and prior to this apartment, I have either always had roommates or lived with my parents.

The last place I lived in was my parents’ basement to save up some money and pay down my student loan debt. I originally planned on being there for at least two years, but after the first year I felt ready to get out of the suburbs and find a place of my own.

Initially, I wasn’t fond of the idea of a studio. I always imagined I would have to fit my bed right next to my kitchen and that I would be eating every meal in bed because there would be no room for a living/eating area. To be honest, there are many shoebox apartments but behind every great place is a great hunt… (most of the time. I got lucky and signed for mine with only two days of searching.)

A lot of people who I have spoken to have said that they would never be able to live in a studio for many different reasons, but the most popular one being that they would feel like they were living in a tiny college dorm room. I agree to a certain extent - a lot of it depends on what kind of floor plan you are working with. For example, if the layout of the space is only 150-200 square feet, your kitchen most likely takes up most of the space and you barely have enough room to put all of your basic furniture (bed, dresser, nightstand, desk, chair, sofa, coffee table, TV stand, eating area).

Here is the floorplan and layout of my 500 square foot studio apartment:


Entrance

The way my entrance is set up plays a huge part in why I am able to set up the rest of the apartment the way I can. As you walk in through the front door, you only see a large storage closet on the left hand side, a long hallway leading straight into the rest of the place, and another small walkway off to the right leading through two other closets and into the bathroom.

Having the front door out of sight from the main living area where I have my bed helps it feel more comfortable with less of that “dorm-room” feel.


Kitchen

As you walk down the hallway toward the main living space, the kitchen is the first space to appear on the left hand side. I am extremely lucky with how updated it is along with having a decent amount of counter space with a dishwasher.


Living Room

One thing that can make a studio apartment feel like a college dorm room is how the living space flows into the bedroom space. I decided to dedicate more room to the living area and turn it into a space where it could be comfortable to have a few friends over, eat meals as well as make it an area that I can also work in.

I separated my bedroom from the living area by creating a divider wall out of wooden crates from Home Depot and staining them. They store my books and hold other miscellaneous items while also defining each space.

The coffee table that my dad and I made together is also my “dining” area.

The little side table by the loveseat was made from a vintage suitcase I found on Ebay and some hairpin legs I bought from Etsy and screwed to the suitcase. The artwork above the loveseat are cloth prints I bought while I was in Thailand framed with these white frames from Amazon.

Another part of the living space is something I could have utilized as an eating nook, but I would rather have more comfortable seating. The industrial shelf is from World Market and the desk lamp is from Amazon. The side cube table is a chest that I found at Brown Elephant and fixed it up by painting the Norwegian Flag on it (you can watch that whole process here). I use this to store my liquor as well as have a side table for the armchair. This helps save more space by being multi-functional while taking up less space than a bar cart would.

This section of the living area is probably my favorite. I was able to fit a decent amount of stuff without it looking crowded or cluttered. Here I have my tv sitting on top of an old console table from my parents that I spiced up with marble contact paper and bull-ring pulls from Joanna Gains’ line. Right below the tv is a perfect area to store my record collection - a mixture of both me and my mom. To the right of the records is her turntable being supported by yet, another suitcase that my best friend picked up for me at Goodwill with a large floor length mirror I found at Home Goods to bring in more light and make the space feel bigger. Finally, all the way to the left are old storage drawers I found at Brown Elephant to store small miscellaneous items that are frequently used with a ZZ plant from the Sill perched on top in front of another long mirror.

Bedroom

The area of my bedroom is pretty much just my queen bed and an Ikea storage cabinet as a nightstand because that is really all the space I need. I spruced it up with some hanging plants to divide the bedroom and living area even more without blocking any light and added (yet another) round mirror from Target above my bed to add more light and space. This is the area that gets the most amount of sunlight so the majority of my plants live on the windowsill. The faux leather pillow case is from Amazon, the lamp is from World Market, and the Star Wars Fin print is by one of my favorite UK artists, Minnie Small (I don’t think she sells this print in her shop anymore, but everything she does is amazing!)


Office / Art Studio

This part of my apartment is definitely the area that is most cluttered. It is where I film and edit photos and videos, paint, and store the majority of my art and photography supplies. Even though it is a really tight space, I wanted to have my desk and easel near the window so I can work with natural sunlight. I used more Home Depot crates to store supplies with a slab of wood to create the surface. Most of my paints are in an old thrifted crate under my desk to hide the computer wires. I also made a 2x4 into a shelf to store my paintbrushes and keep them nicely displayed and out of the way when I am not painting.

Bathroom

My bathroom is tiny, but has more storage than most tiny Chicago apartment bathrooms do. To make it not feel any more cramped than it already is, I picked out a white shower curtain with a minimalist pattern.

For storage, I’m lucky to have some under the sink, so I utilize this for most of my toiletries which I try to keep at a minimum to avoid clutter. I also have a couple of secondary storage items to display some products and plants.


Closets + Other Storage

The closets are one of the top reasons that attracted me to this apartment and why I signed for it. I have a lot of stuff to store including my art, photography and travel equipment. In one closet, I am able to fit a tall skinny dresser, my printer, my paper storage filing cabinet, art and photography supplies, some coats and other miscellaneous items. The other two closets are used for my clothing storage.


in conclusion…

So, I hope that this post helps anyone thinking about moving into a studio, or even inspires them to take on the challenge. There is of course that stigma attached to “studio apartment” that make people think they’re not functional and they are tiny and dingy… but the biggest thing is to plan out what items are necessities for your day-to-day life, utilizing what storage you have in the best way you can and also sometimes sacrificing space from one area to make another one bigger - in my case it was my bedroom that got the shorter end of the stick. But if you haven’t guessed by now, I am completely in love with my place. :)

Thank you so much for reading this post! If it fancies you, leave in the comments what room in your apartment/household is most important to you and why?

8 Ways to Help You Come up with New Ideas

8 ways to come up with new ideas.png

(This blog post may contain affiliate links. If you click on one of my affiliate links and make a purchase, I may receive a small commission for referring you. This comes at no additional cost to you. Please note I only offer resources that I have used and strongly recommend!)

Growing up as someone who loved to draw, paint, and basically do anything that involved creating something, I was always amazed and mesmerized by a sketchbook that had been completely filled from cover to cover with a new idea on every single spread. I loved flipping through the pages that had been wrinkled from the paint strokes and ink marks that filled every single page.

Today I am still working on my sketchbook habits to make it an every day ritual because my sketchbook is usually where bigger ideas start. Lately, I have found myself hesitating to put my pencil on the paper and just start sketching whatever comes to mind.

This list isn’t a prompt list, but it is more of a general outline of different things that I have found helpful to me to generate new ideas. I have been working on getting into a daily habit to not only feel good mentally and physically, but also to help creativity flow a little more naturally.

  1. Get healthy. I know, we’re not talking about running a marathon here, we are talking about coming up with new ideas. When I am in a good routine of working out and eating healthy, I find that my head is clearer and I feel better (both mentally and physically) which helps me think more freely and come up with ideas that I may not have come up with when I was neglecting my health.

  2. Travel. A lot of artists that I know of bring along a sketchbook to document their travels. I tried to get in the habit of this, but for the past two trips it has not worked out for me because I never find the time to do it. I am usually focused on shooting photographs, out exploring, or enjoying the company of who I am with. Maybe if I travel more by myself I would find more time to sketch. Something I do instead is summarize what I did during the day in the notes app on my phone so I can refer back to them whenever I want. This helps me gather my thoughts and think about how I can create something out of what I experienced that day.

  3. Have a cramming session of writing down whatever comes to mind and put all of those prompts into a jar. When you hit a creative block, pick out one of those prompts (or multiple) and create what you interpret from those prompts. If you need some help coming up with things to write down, check out my ‘An Endless List of Drawing Prompts to Fill your Sketchbook’ blog post. :)

  4. Look through the saved photos on your phone. Who doesn’t take photos on their phones now a days? There are more moments that we capture on our phones from day to day than we may even realize. If I ever hit a creative road block, I will scroll through my photos and choose something that sticks out to me.

  5. Go to a museum. Not to be mistaken with recreating something you see at the museum, but I remember always feeling inspired when I walked around new exhibits. A small detail that you see in a piece can spark an idea for a bigger project.

  6. Scroll through social media. This is an obvious one. If I ever run into a block where I can’t come up with an idea but I still want to practice sketching or painting, I will find a photo on Instagram or Pinterest that someone posted (ex. a lifestyle picture of a woman sitting on a stoop) and draw that in my own interpretation. I won’t necessarily post this because it wasn’t an idea that I originally came up with but it helps me practice my skills.

  7. Take classes on Skillshare. Skillshare is such a great tool for anyone looking to develop their skills under the creative umbrella, in business, technology, or lifestyle. There are thousands of free classes you can access, or you can pay for a membership to have access to every single class. Whenever I am feeling stuck on creativity or finding it hard to get motivated to create, Skillshare is an easy way to get myself going. (This totally sounds like a sponsorship, but it 100% is not. I just love Skillshare!). Sometimes I feel as though I could have saved my money on tuition and dedicated my education to learning what I need to on Skillshare and YouTube. Which leads me to my next point…

  8. Watch YouTube videos. I can’t tell you enough how much I owe a lot of my creative knowledge and skills to YouTube. Yes, you can go down a rabbit hole of watching videos of dogs who can talk or someone doing ASMR, but the majority of the time where I am either trying to learn something or I just want to find a video that will get me thinking, I will go to YouTube.

I hope this list of things that you can do to wake up the creative side of your brain helps! If you have anything else to add to this list that you do to generate new ideas, please feel free to share in the comments!

Similar posts you may be interested in:

An Endless List of Drawing Prompts to Fill Your Sketchbook

Sketchbook Tour

Studio Blog 002 // Mini-Travel Sketchbook Tour + Planning a Painting

Gallery Block
This is an example. To display your Instagram posts, double-click here to add an account or select an existing connected account. Learn more

Iceland Ring Road Packing Checklist (with a downloadable link)

Iceland Ring Road Packing List-2.png

(This blog post may contain affiliate links. If you click on one of my affiliate links and make a purchase, I may receive a small commission for referring you. This comes at no additional cost to you. Please note I only offer resources that I have used and strongly recommend!)

Even though I love to travel, one of my least favorite parts about it is packing. I always leave it to the last minute, sometimes hours before my flight.

However, with the excursions we had planned for Iceland and the fact that we were going to be living out of a van for twelve days, I knew that this was one of those trips where I could not leave it all to the last second. We had our trip planned for about nine months, and over that period of time we gradually bought the gear and equipment we needed.

Packing for the Ring Road was definitely tricky, so for anyone who is struggling to think of what to bring for their trip, here is a list of what I had for our twelve day road trip this past October.

You may also download a printable document of this list by clicking here!


Iceland Ring Road Packing List

CLOTHING

Layering is everything when you are traveling in Iceland. You want to be prepared for conditions that are from dry and mild to wet and freezing. Having layers on comes in handy because you can add or remove them as the weather conditions change. For the twelve days we were there, I had about five outfits and re-wore each of them about three times. I know… this probably sounds gross to some people but this trip isn’t meant for you to look glamorous the whole time.

SHOES

If you plan to mostly hike and sightsee during your trip, you really don’t need a whole lot of shoes to choose from. We wore our waterproof hiking shoes every single day for the majority of the day because we never knew how the trail conditions of the hikes would be. They ended up being mostly muddy so the boots were put to good use.

WINTER WEAR EXTRAS

You can never go wrong with having extra winter gear. You definitely want to cover as much skin as possible when you are in the colder parts of Iceland.

CAMPING GEAR

TECHNOLOGY / CAMERA EQUIPMENT

SHOWER ITEMS

A mistake I made was not bringing a bag to put all of my toiletries in to carry to the camp showers. Luckily my sister had something that I could borrow, but having a drybag to carry all of your toiletries in helps keep the van organized and makes your trip to the showers much easier. I also highly recommend a microfiber bath towel because they are compact and don’t take up as much room.

ADDITIONAL TOILETRIES

  • Face masks, eye masks - You cannot bring enough of these. I didn’t think to bring any masks otherwise I would have done one every night to fight the dry air

  • Rosewater facial mist - This is nice to spray on your face throughout the day to keep it from drying out

  • Aquaphor - great for extremely dry skin

  • Travel first aid kit

  • Body / hand lotion

  • Lip balm

  • Baby wipes - these are fantastic with cleaning up any messes, wiping dishes clean if you do not have access to a sink, wiping down the van, etc.

  • Hand warmers

  • Foot warmers

DRY FOOD

Download a printable document of this list by clicking here!

I hope that this helps you! If you have any questions, feel free to ask in the comments below!

Gallery Block
This is an example. To display your Instagram posts, double-click here to add an account or select an existing connected account. Learn more

Iceland Ring Road Travel Tips

(This blog post may contain affiliate links. If you click on one of my affiliate links and make a purchase, I may receive a small commission for referring you. This comes at no additional cost to you. Please note I only offer resources that I have used and strongly recommend!)

ICELAND RING ROAD TRAVEL TIPS-2.png

Do not step or walk on the moss.

As you are traveling throughout Iceland, there are certain parts you will pass through that have beautiful lava rock fields with moss growing on it. It will be tempting to stop on the side of the road and get your Instagram-worthy photo, but DO NOT STEP OR DRIVE ON THE MOSS. It is extremely fragile and can take hundreds of years to repair. With tourism in Iceland gaining popularity in recent years, many areas of the moss fields have been destroyed by tourists walking where they shouldn’t.

I do not recommend speeding.

In general, I do not recommend speeding at all but, it may be tempting when you have a stretch of open road ahead of you with no cops around. In Iceland there are satellite cameras posted throughout the Ring Road. The last thing you want when you are home saving money for your next trip is a speeding ticket.

BÓNUS Supermarket is the best place to get groceries on a budget.

To give you some perspective of how expensive Iceland is, a single serving of fish ‘n chips cost us $25 USD. Yes, seriously. When we were planning our trip the cost of food was one of our concerns, but we learned that one of Iceland’s main grocery stores, Bónus Supermarket, was a great way to do Iceland on a budget. I highly recommend planning to cook your own meals with groceries from Bónus rather than going out to eat if you want to save money. We spent about $115 USD for the three of us, and our food lasted about a week.

When you go grocery shopping, don’t buy all your food in one stop.

Split the grocery shopping for your trip up in half or in thirds so you don’t have any food that will spoil. We were scrambling to eat some of the food we bought so it wouldn’t go to waste, and we also could have saved some space in our cooler and in the van.

The tap water is great to drink - you can’t get anything better than it.

I seriously miss the water in Iceland. I miss being able to go to any faucet to fill my HydroFlask with some of the cleanest water in the world.

‘Impassable’ road signs means that the road is closed.

We had to learn the hard way. Our first thought was that impassable meant you couldn’t pass any other vehicles on the road, but after continuing on a snowy and narrow road for quite some time, we found online that it meant that the road was closed to visitors and if you get stuck, you’re out of luck.

You don’t need to pack as many clothes as you think you do.

This is more so advice from my friend and my sister who packed more than what they feel they needed. I had five outfits for the trip, one pair of pajamas, a pair of flip flops for the showers, moccasin slippers for the van, and my hiking boots and felt I packed the right amount. Each outfit I wore 2-3 times over the course of twelve days. It is also not a bad idea to get these charcoal air purifiers to put in your bags and your shoes to keep your clothing as fresh as possible. There are washing machines at many campsites, but we never got around to doing any laundry.

The air is very dry.

Bring extra moisturizers / sheet masks and even a travel humidifier if you are used to humid climate. Our skin was extremely dry and we were wishing we had been a little more prepared.

Plan your meals ahead of time.

This will help you decide on what to buy at the grocery store and help you stick to your budget. I also recommend that you plan your meals so that they are simple and don’t require a lot of cooking. Some campsites don’t have great kitchens with all the resources you need, or they get crowded with other campers prepping their meals.

Set up a PIN number on your credit card.

You will need this mostly for gas, as the pumps will not take credit cards without a PIN number. Some places take Discover (honestly, more places accepted it than we had anticipated), but everywhere takes Mastercard and Visa. I have a travel Mastercard with no foreign transaction fees, so we used that wherever Discover wasn’t accepted (which also has no foreign transaction fees).

Without questioning, get the four wheel drive vehicle.

If you will be driving in snowy parts of Iceland (Northeastern / Northern / Eastern Regions / high in the mountains), four wheel drive is worth getting, hands down. While we were driving in the snowy mountains, we saw a few cars that were flipped in ditches and we couldn’t imagine what we would do if that happened to us.

Invest in travel insurance.

This comes in handy if you have any injuries, or if there are any damages to the vehicle you rent (we ended up getting a few scratches from rocks that kicked up and dents from horses biting the van… if your curious you can read more about our interaction with the horses in my summary post here.)

Get WiFi and use Google maps for navigation rather than using a GPS.

We paid an extra fee to have both a WiFi router that traveled with us as well as a separate GPS system in case the WiFi was not reliable. It turned out Google Maps was more accurate and much easier to use than the GPS. Overall throughout the whole trip, we had great a WiFi signal with just our three phones connected to it. We got to some points where the signal was week, but Google Maps was still able to track and show us where we were as long as we had started the navigation when there was a strong signal.

When leaving Iceland, get to the airport early.

Keflavík International Airport was the most tedious airport I’ve ever gone through and there were a lot of checkpoints between when you arrive and when you board the plane. We arrived to the airport four hours before our flight, and by the time we got to our gate we had about twenty minutes to spare.

Related Posts:

Iceland Ring Road Trip Summary: My adventures of living out of a van and traveling the Ring Road

My Week In Thailand

Thailand Travel Facts & Tips

I hope this information helps! Feel free to leave a comment below if you have any questions!

Gallery Block
This is an example. To display your Instagram posts, double-click here to add an account or select an existing connected account. Learn more

Iceland Ring Road Trip Summary

Iceland Ring Road.png

(This blog post may contain affiliate links. If you click on one of my affiliate links and make a purchase, I may receive a small commission for referring you. This comes at no additional cost to you. Please note I only offer resources that I have used and strongly recommend!)

Why Iceland? What is there to do there? I didn’t even know people live there.

These were all questions and comments I got while planning my trip to Iceland and still get after being back. Before researching Iceland, I also had these same thoughts but in recent years Iceland has become a tourist destination for it’s majestic waterfalls, beautiful hikes and prime location to see the Northern Lights.

At first glimpse, Iceland is expensive. But with about nine months of research and planning, we were able to gradually accumulate the gear that we needed and save our pennies.

DAY ONE - 9/29/18

We had a direct flight with WOW Airways from Chicago to Reykjavik at midnight. Iceland is five hours ahead of Chicago, and the flight was five to six hours, so we landed around 11am Reykjavik time.

Once we got our luggage, we were picked up from the airport by Lava Car Rentals, the company who we rented our camper van from and taken to their office to pick it up (we named her Lola). We got all settled into our new home on wheels and headed off to the Blue Lagoon.

We arrived to the Blue Lagoon and were welcomed at their front desk, where we checked in with our tickets and received a towel and instructions on what to do before we went into the lagoon. We headed on up to the women’s locker room, showered to slick our hair up in heaping amounts of conditioner so it wouldn’t fry in the chemically treated lagoon and got into our swimsuits.

We walked outside and nearly froze in the 40-ish degree weather, but it was so worth it when our toes hit the water. We received one complimentary drink from the lagoon bar, and also had our first sip of fresh Icelandic water from the drinking fountain under one of the bridges.

Overall, we had a great start to the trip by going to the Blue Lagoon. I am happy that it was the first place we went to after our flight landed because we were pretty exhausted and in need of bathing. If you are going to Iceland to do the Ring Road, I recommend stopping by the Blue Lagoon because of it’s beauty and popularity, however I don’t think it should be the sole purpose and reason why you should want to go to Iceland because there is so much more to see and experience.

We hopped back into Lola and headed off to a grocery store called Bónus Supermarket. It is one of two popular grocery stores in Iceland with great prices. We were able to buy groceries for a little more than half of our trip for the tree of us for only $115. Not bad at all considering that Iceland in general is pretty expensive!

The first campsite of our trip was the Reykjavik Campsite. Our first dinner meal was rice and hot dogs (so fancy, I know) which ended up tasting better than one would think. It was also our first real meal since we left for the airport in Chicago the night before so we were also starving!

We cleaned up after dinner, then headed back to Lola to turn her down for bed. We quickly found out that this was going to be a good 30-45 minute chore to tackle every day… The three of us took turns getting our pajamas and our clothes out of our giant suitcases for the next day; then followed a game of Tetris with said suitcases to get them to fit under the bench that ran parallel to the side of the van. After that was done, we reconfigured the seating area with the pieces of plywood we were given to make the full-sized bed for the three of us to share.

That night, we got off to a rough start with Lola. With it being completely our fault, the heater to keep us warm while we were sleeping turned off and the van became freezing cold. It was our fault because while we were getting ready for bed, we had the doors open andthe heater blasting. It charges while the van is running, so we completely drained it and it shut off by 11pm or so. We ended up running the van for a good 30 minutes and that was enough to recharge the heater to last throughout the rest of the night.

DAY TWO - 9/30/18

We made it through the somewhat freezing night and woke up feeling excited for a full day in Iceland! We woke up, had some breakfast, met some nice Canadian ladies who gave us free beer and wine, and then hit the road.

Our first stop was Þingvellir (Thingvellir), a national park just east of Reyjkavik and our first stop within the Golden Circle. Þingvellir translates to “Parliament Plains” and is the place where many historical events have happened, therefore making it one of the most sacred places to Icelanders. Today, it is now a protected national park where tourists can enjoy the epic views. I highly recommend visiting!

Later on in the afternoon, our first big hike of the day was to Brúarfoss Waterfall in Brekkuskógur, where we had our first interaction with feeding carrots to wild horses (important note: if you give a horse one carrot, they will be your best friend and follow you around like a lost puppy. If you decide to bring carrots, bring more than just one, and be prepared to spend quite a bit of time with them).

The Brúarfoss hike was about a 30 minute trip and it was quite confusing. There is a muddy trail that over time was created by visitors on private property, which is closed to the public due to people destroying the natural habitat and also because it is trespassing on someones property. We were pretty confused getting to the waterfall because the lot that we parked at had a path that followed a river and eventually led us to the private path, which we realized that we had taken the wrong trail when we had to climb a barb-wired fence. It turns out that the path you are supposed to take follows along the road for about 1.5 kilometers, then you take a left at a long gravel road with a traffic barricade and you continue walking until you start seeing signs for Brúrarfoss to follow. The hike was pretty muddy so we were happy to have worn our hiking boots!

Our final hike of the day was to Gullfoss. This is such a massive and powerful waterfall - a short walk from the parking lot and when we got to the end of the pathway, we were able to climb onto some rocks to see it up close.

That night, we camped at Gesthús Selfoss Campsite.

DAY THREE - 10/1/18

Day three was a bit of a chilly start. We bundled up and headed off to our first cave called Efra-Hvolshellar, or also known as the “Irish caves.” They have been around since before the 19th century.

Our next stop was Gluggafoss (also known as Merkjarfoss). It was a short drive up a gravel road from Highway One and we were able to walk up close to get some great photos. We saw our first couple of rainbows both at the waterfall and shortly after leaving - it was the strongest and brightest rainbow we have ever seen!

Once we finished up at Gluggafoss, we set out to head to a very well known waterfall that most people know as the one you can walk behind, called Seljalandsfoss. With this waterfall, we had to put our raincoats on because there is no way you can experience it without getting wet. I had on a raincoat over my winter coat, a protective sleeve that went over my camera to protect it from the mist, and finally a poncho over all of that to give my camera more protection. It was a bit difficult to take photographs but luckily my sister and friend didn’t mind waiting for me to get situated.

Once we made our way around the path behind the waterfall, we had about a fifteen minute walk to Gljufrabui, which is a hidden waterfall and probably one of my favorite ones of the entire trip. To get there, you have to walk into a gorge along rocks of a shallow stream. It is not a long walk to get to the hidden waterfall, but there were quite a few people waiting to go in or come out, and there was only one path to get in and out. Once we got in, the view was absolutely unbelievable. There is a giant rock you can climb on to stand closer (as well as to get an epic picture) looking up at the waterfall that is surrounding you. This moment gave me butterflies!

Our next venture was to, yet another waterfall, called Skogafoss. This is one of the biggest waterfalls in Iceland, as well as one of the wettest if you decide to hike the trail next to it, which I highly recommend. Skogafoss was one surprise after the next; as we kept hiking, we found another drop or bend in the stream. Round trip, it took us about an hour and a half to walk up and back, however we could have continued further.

Skogafoss was our last stop of the day. We were planning to stay at Skogar Campsite which is right next to the waterfall, but the office to pay was closed until the next day so we backtracked about twenty minutes and drove back to Seljalandsfoss and Gljufrabui where there was a campsite called Hamragarðar next to those waterfalls.

We had a big pasta dinner and an early night to bed to get enough rest for our glacier hike the next morning.

DAY FOUR - 10/2/18

We woke up around 7am to get ready for the day, pack the van back up and head off to our 9am hike of Sólheimajökull Glacier. This glacier has two volcanoes buried underneath, one of them being the volcano that erupted in 2010.

Once we got to the parking lot and office (which is a decked out school bus), we signed in and rented the equipment we needed for the hike - a helmet, climbing shoes, crampons, a harness, and an ax pick.

There was a group of about 15-20 people on the morning hike, and two guides. We split up into two groups and trekked off.

To get to the glacier, we had to hike along a black sand beached area for about 1.5 kilometers, which used to be where the glacier reached before the 2010 volcanic eruption. Once we got to the point where the glacier started, our guide taught us how to put our crampons on our boots, which are spikes that are used to grip the ice and climb vertically. He also gave us some facts about the glacier and volcanoes within it - specifically one that erupts every 30 to 100 years and how the last time it erupted was 1918… he advised that if we saw him running that we should run with him…

About 15 minutes into the hike, I realized that I made a mistake. I packed my backpack with extra stuff that I didn’t necessarily need on this hike, most of them being extra layers and some camera equipment which made it heavier and a little tougher on my back.

About two hours into the hike, we stopped at about a 10 meter wall to take a break while our guide set up the climbing gear. One by one, each of us got to experience climbing the glacier. It was thrilling, scary, tough, and something I got to check off on my bucket list.

Once we were finished up with climbing, we started to trek back down, making it about a 6 hour round trip. The weather could not have been better with the sun and blue skies out all day.

Our next stop was Reynisfjara Black Sand Beach and Hálsanefshellir Cave. Since it was later in the day it was pretty crowded. The cave is located on the beach and has some incredible stones in the shapes of vertical columns.

One thing to definitely know about any beach you go to in Iceland are the sneaker waves. This beach having pretty massive waves but some you won’t see coming until it is too late. There have been some cases of people getting sucked in and drowning because they are too close to the shoreline - no picture is worth that risk.

We then headed off to the Vik Campsite for the night.

DAY FIVE - 10/3/18

Hjörleifshöfði Cave was our first stop on our fifth day. We arrived early to the parking lot and walked about 1 kilometer to the beach and around to the cave shaped like Yoda. We were able to get some pretty nice photos since we were the only ones there.

Fjaðrárgljúfur Canyon was our next hike. This canyon had walls that were about 100 meters steep inhabited by moss and florals, and dates back to about two million years ago, which was around the cold periods of the Ice Age! The hike took us about an hour and a half to complete.

Our next venture was to the campsite for the night which turned out to be one of our favorites - Skaftafell Camping. The grounds are right next to the hiking trails to Hundafoss and Svartifoss Waterfalls. At this point in our trip, we only had as much as rice with hot dogs, peanut butter and jelly sandwiches, mac and cheese, and protein bars so we were craving something fried. Before the hike we decided to stop at the food stand at the visitors lot and splurge on a $25 fish ‘n’ chips. Yes, that kind of price is normal in Iceland.

The hike to Hundafoss and Svartifoss took us about 90 minutes round trip where we got to see both waterfalls and have incredible views of the surrounding mountains. If you plan on going on this hike, make sure to bring plenty water and some protein bars because the whole thing is uphill.

DAY SIX - 10/4/18

We had another early start to pack our day with as much sightseeing as we could. Our first visit was to Hofskirkja Church, which is the last of the 6 turf churches in Iceland to be built in this style.

We then headed off to the infamous Diamond Beach, where the small strip of black sand holds many washed up chunks of ice from a nearby iceberg, looking like a beach full of diamonds. We were glad to arrive early because of how crowded it was.

Right across the highway from the Diamond Beach was the Jökulsárlón Glacier Lagoon. This was an amazing sight of icebergs floating in the bay with a backdrop of snowy mountains. We were also able to spot a seal swimming around.

After spending about an hour or so staring in awe at the icebergs, we headed to the Hoffell Hot Tubs, which are located in the middle of nowhere with a scenic view of the mountains. While we were researching and planning our trip, we read about how Icelanders love their pools and their hot tubs, and a blogger that we followed for tips for Iceland planning recommended these ones.

We paid about $25 per person at the entrance and changed into our swimsuits in one of the trailers on the grounds. We were required to rinse ourselves off before going into the hot tubs at their outdoor showers.

We really didn’t stay in for long. It was very relaxing and peaceful, but we realized that sitting in a hot tub for an extended period of time wasn’t our top favorite activity to do. We took our pictures, changed and got back on the road.

Old Viking Village was our next stop in the small town of Höfn. This village is privately owned by a farmer, but allows tourists to visit for a small fee. The Old Viking Village can mistakenly look like a real abandoned spot, however it was built back in 2010 for an Icelandic movie that was never filmed. We were able to wander around and feel like we went back in time.

Vesturhorn Mountain surrounds this village, and the best spot for photos of it is at the Stokksnes Black Sand Beach. This view looked like a postcard with the black sand, the rolling hills on the beach and the way the fog settled at the base of the mountains.

Before hitting the road again, we stopped by the Viking Cafe to relax and have some coffee. We each ordered a swissmakka (their version of a delicious mocha) and took a breather.

Once we got to our next campsite, Djúpivogur Camping Ground, we first stopped by JFS - Icelandic Handcrafts. I recommend anyone to stop by here for a visit. This is a small family owned shop where everything is hand made by the owner, Jon. He makes jewelry, home decor, and kitchen tools out of stone, glass and fallen reindeer antlers that he has locally created over the years. We were there for about an hour just chatting with him and hearing about his story.

After saying our goodbyes, we checked into our campsite and settled down with our usual nightly routine.


DAY SEVEN - 10/5/18

We started off early the next morning with a quick stop by a smaller waterfall called Sveinsstekksfoss. This was right off of the road and a nice place to see the sun coming up.

When we were leaving, there were what seemed to be hundreds of sheep in the area and after driving for a few minutes, we came up to a pull-off area right next to a group of them. We remembered that we had carrots in the cooler, so we pulled off the road and got them out to try to feed them to the sheep. Well, we quickly realized that they weren’t so much of a “people” type of crowd when they just ignored us even with a carrot under their nose.

We hit the road again, and set off to prepare for a longer day of driving than usual. We entered the Eastern Region of Iceland where we started to drive more up in the mountains and through the snow. There was one waterfall in particular that was in a snowy area that we attempted to go to called Klifbrekku Waterfall. When we got onto the road that led to it, there was a sign that said “Impassable.” We questioned it when we got on, but assumed it meant that we just couldn’t pass anybody on the road. However, still not convinced that this was the meaning, I was able to get a decent WiFi connection to find out online that it meant “road closed.” We ended up stopping on the one-lane snowy road that had a steep decline on either side to turn Lola around. My sister, Kristi, was behind the wheel at the time, and thank goodness our dad made us learn how to drive in a pick-up truck because those skills came in handy at this time! Myself and our friend got out on either side of Lola to direct Kristi, and with more than a few point turns, she got Lola around!

After a couple hours of driving in the mountains, we decided to stop in a cute, small artistic town called Seydisfjordur. This was probably one of my favorite towns out of the whole trip besides Reykjavik to visit because it was thriving with art. I never imagined that Iceland would be a country where art was so celebrated. There were buildings completely used as an artists’ canvas, and random spots that had these amazing murals painted on them. What I assume is Seydisfjordur’s downtown area, there was a rainbow painted path surrounded by these artsy buildings that led to a baby blue church. We walked around for a bit and then had some coffee tea at Nordic Restaurant that was in the same area.

We drove a bit more, and stopped by Grjortagja cave - which, for you Game of Thrones fans, is where Jon Snow lost his virginity. There were two entrances to the cave, and we quickly realized how amazing television can do with making a small space look huge. We couldn’t go all the way into the cave but compared to how the cave looks in GOT, we were shocked by how small it was.

Our next stop was the Hverir Geothermal area. This place stinks. Really, it stinks… it smells like rotten eggs because of the geothermal activity (which we could sometimes smell in certain campsites tap water because that is how their water is heated). If you are really sensitive to smells, this might not be your favorite spot to visit. However, it was really neat to see the bubbling pools and craters that you would never find anywhere in the states. I felt like this was the closest I would get to experiencing Mars.

We headed off to the next campsite (can’t remember the name of it) that ended up being closed because of the amount of snow on the ground. After a bit of panicking, we found another campsite called Vogar Campgrounds about ten minutes further that had a pizza place next to it called Daddi’s Pizza. We checked into the campsite there and found out that we got a 15% discount since we were staying at the campsite, so we all split a large.

Our last venture of the day was one we were most excited for. We drove out to the middle of nowhere (more so than where we already were) and visited Snow Dogs. This is a family owned farm where about thirty Siberian husky’s live and on their website you are able to book to either go sledding or even just go visit the dogs. We weren’t able to go sledding, but we met a handful of one-year-old, five-month-old and three-week-old puppies. It was definitely one of the highlights to the day! Every single one of them were so sweet and just wanted to get pets and cuddles from us!

DAY EIGHT - 10/6/18

We started off our eighth day at Goðafoss waterfall, a gorgeous beast located right off of the Ring Road. Although this waterfall only stands at a height of twelve meters, it spans at a length of over thirty meters. After reading a bit more about it after visiting, an interesting fact is that it played a big role in Iceland’s conversion to Christianity back in the year 1000. Þorgeir Ljósvetningagoði, who was a lawspeaker, threw his statues of Norse gods into this waterfall after he declared Christianity as Iceland’s official religion.

The small town of Akureyri was our next destination. We wandered around to take some photos of the town’s church that was on top of a hill and and also indulge in Icelandic hot dogs and Appelin at an outdoor stand called Bæjarins Beztu. We each had a traditional hot dog that had crispy and sauteed onions, cocktail sauce, and one or two other toppings that I can’t recall… Very different than the typical Chicago dog, but very delicious!

Our last stop of the day was Hvitserkur Rock, a basalt cliff that looks a bit like a three-legged animal. The rock has been reinforced by concrete at its base to prevent it from falling over. The drive to the site was not all that nice, considering that the road was a full twelve kilometers of nasty potholes, but once you get to the parking lot, there is a trail that leads to the side of the cliff for a nice aerial view.

DAY NINE - 10/7/18

First stop of day nine was the Gerðuberg Cliffs. These cliffs are made of the same rock (basalt) as the Hvitserkur Rock we saw the night prior. The cliffs are a little difficult to spot from the road because they blend in pretty well with the surrounding environment and span over 500 meters.

We did a lot of driving again this day, where we were getting really close to coming full circle around the whole island. We entered the Snæfellsness Peninsula where we would spend our last few days of our trip. and eventually got to Kirkjufell, which is a mountain that was filmed in Game of Thrones. Right next to the mountain is Kirkjufellsfoss waterfall, which has a path that trails around the waterfall for a top view.

We then headed off to Landbrotalaug Hot Springs. This is a natural hot springs that is free for anyone to take a dip, however upon arriving we found out that yet again, the internet never fails to make tiny spaces look huge. There was enough room for two people to go in at the same time, but it was cool to see that this tiny pond naturally heated from the earth without any other assistance.

The first stop on the Peninsula was the Búðakirkja, or the Black Church. I could be wrong, but I heard that this was the most photographed church in Iceland. There is a winding road leading up to the front doors surrounded my moss and lava rocks. Once we arrived, a newlywed couple stepped out with a priest! We just crashed a wedding!

We were on our way to our campsite for the night, Snorrastadir Camping. This is a horse farm where you can rent a horse to go riding, however I warn anyone who will be staying here to think twice about feeding them. We still had carrots leftover and came up to a pull off on the road leading to the farm that had about ten or fifteen horses nearby. As we stopped, all of the horses looked up at us and right away I knew that we were going to have a hard time getting out of this one. We figured that these horses are used to getting fed with all of the campers coming to stay every day and not moments later they all came over to greet us. Long story short, it took us a while to be able to get back into the car and back on the road because they had surrounded Lola wanting more carrots.

Over the course of the whole trip, we were keeping an eye on the forecast for the Northern Lights on this app called Aurora. The first week we were there, the forecast hadn’t been as great as what it usually was so we were starting to get worried that we wouldn’t see them at this point in the trip. We were hopeful though, because this horse farm was pretty far away from light pollution, and in an area where you can drive ten minutes away and be totally in the dark. We were getting Lola ready for bed, and I hopped outside to get something from the front seat as well as check to see if I could get a glimpse of them. The first thing I saw was what looked like a cloud, but with a green tint to it. Being optimistic, I walked around the corner of the barn we were parked next to and saw the grey cloud-like form fade into a bright green streak that continued on for probably miles! I ran back to Lola to tell my sister and friend that they were out, grabbed my camera and spent the next hour or so snapping photos. We had finally seen them and can check them off of our bucket list!

DAY TEN - 10/8/18

We continued our journey exploring the Snæfellsness Peninsula. We started off by venturing toward Fjöruhúsið café and around the shoreline near Gatklettur. We walked around for an hour or two taking in the amazing sights of the cliffs and the water.

After eating lunch outside at a picnic table, we headed off to Rauðfeldsgjá Gorge. This translates to Red Mountain Rift and is a natural wonder of the Snæfellsness Peninsula. We were able to hike uphill to the opening of the gorge, which ended up being a bit more of a hike than it looked from the road. To get inside, we had to walk up in a stream along with other tourists. Once we were in, there was an open area to stand to get photos, and further along there was the stream that continued up further into the gorge. There were many people trekking further, but it was not the smartest idea because of how dangerous it was, so we decided to head back once we got to this point.

After the gorge, we headed to Ytri Tunga Beach to hopefully catch a glimpse of some seals, as this was a popular spot where they hung out. Unfortunately, we were unlucky but got to enjoy one of our last moments at the shoreline.

We went back to Snorrastadir Camping to spend another night, got lucky again and saw the Northern Lights and got ready for our biggest hike the next morning.

DAY ELEVEN - 10/9/18

Coming to a close on the trip, I started to feel the post-travel blues when we left the horse farm to complete our final hike. Glymur is the second-tallest waterfall in Iceland with a hiking trail that hikes up into the snow caps of the mountain, over the waterfall and back down to the start of the trails, totaling to be about a four hour round trip.

What made this hike slightly more difficult than the others we have done were the steep inclines, the narrow trails that were most of the time right next to a cliff, and the river we had to cross twice. There was an option to stay on one side of the waterfall, but the downside to that was that you were not going to get a good view of the waterfall. Within fifteen minutes of the hike, we came to the river with no decent path to cross. In order to get to the other side we had to walk through it and get soaked. The river was about thigh deep and had a strong current to the point where we had to link arms to get every one of us across without being taken away by it. Once we were across, we took our shoes and socks off to ring them out and continued on. It took us another hour and a half to two hours to get to the snow caps and on top of the waterfall, which is 198 meters tall. We crossed the river again at the top of the drop and got over to the other side. Heading down the trail was much easier and not as nerve racking.

We finished up the hike, had some peanut butter and jelly with Lola and completed driving the entire Ring Road by heading back to Reykjavik! It was and still is such a bitter sweet feeling.

We ended up getting an Airbnb in Reykjavik to re-pack our bags, clean out Lola and clean our hiking boots before heading back to the states. This was also the first night where each of us got our own beds in eleven days rather than sharing a full-size cushion. It was such a great feeling!

DAY TWELVE - 10/10/18

The post-travel blues really set in when we checked out of our Airbnb. We spent our last day in Iceland exploring Reykjavik. We first stopped by the Grótta Island Lighthouse, went on the Sculpture and Shore Walk and continued to wander around the city.

We stopped for a pastry at Brauð & Co and a coffee at Reykjavik Roasters - Brautarholt before going to the famous Hallgrimskirkja Church. We bought tickets to go up in the clock tower and got the best view of Reykjavik! From this point, we were able to see all of the colorful buildings with the mountains and bright blue skies in the background.

Reykjavik really earned its place in my heart. Living in Chicago, I am used to seeing graffiti on buildings, but everywhere we turned there was the kind of murals you could tell that artists were commissioned to do. I found it so thrilling that this was a huge part of Reykjavik’s culture and it gave me some ideas of direction for what I want to do with my art style.

We had a night flight back to Chicago, so around 3pm we finished up our sightseeing, took Lola for a much needed wash and headed back to Lava Rental to part ways with her (another bittersweet moment). Getting through Keflavik Airport was very tedious and a long process than what we are used to, so make sure to get there at least four hours early.


As I finish up this summary post, I cannot help to have a strong feeling of nostalgia as I recall our days, and a bit of heartbreak that these adventures had to come to an end. It has been a month since we were there and I am still feeling that post-travel depression that I think will still linger for some time. Iceland was a place where I was in my element. The hikes we conquered, the waterfalls we saw, the people we met, the mountains we were surrounded by and the Northern Lights that danced all night never failed to amaze us.

To anyone who is thinking about visiting Iceland, do it. It is worth everything, and I plan to visit again for a round two someday. :)


Related Posts:

Iceland Ring Road Travel Tips

My Week In Thailand

Thailand Travel Facts & Tips

If you have any questions about our trip, feel free to ask in the comments below!

*Keep an eye out for an “Iceland: Tips and Advice” post as well as a “Packing List” Post coming soon!

Gallery Block
This is an example. To display your Instagram posts, double-click here to add an account or select an existing connected account. Learn more


Thailand Travel Facts & Tips - A few things you should know before your arrival

Thailand Travel Facts and Tips.png

(This blog post may contain affiliate links. If you click on one of my affiliate links and make a purchase, I may receive a small commission for referring you. This comes at no additional cost to you. Please note I only offer resources that I have used and strongly recommend!)

Make sure to check out my previous post, "My Week in Thailand" here!

Facts + Tips

One reason why I love to travel so much is because no matter where you go, whether it is a different city in the country you are from or somewhere on the opposite side of the world, they will always have a different way of doing things. Some of those things make sense to you right off the bat, and other things are so bizarre that you have no idea what to think of them. 

While I was in Thailand, I kept note of different facts that popped up that I knew would come in handy for others to know while planning their trip to Thailand. Here is a list of a few things that stood out to me (I will continue to add to this list as I think of more facts worth knowing, and if you have any questions feel free to ask me in the comments section at the end of this blog post):

You can't flush toilet paper down the toilet. 

This was a bit of a shocker for both Jordyn and I when we first arrived to our Airbnb, but I have heard of other countries not allowing this as well. There was a laminated manual right next to the toilet on how to use it, including the highlighted, bold, and capitalized instruction to not throw toilet paper down the toilet. Restrooms commonly have a little wastebasket with a lid right next to the toilet for you to throw used toilet paper into, as well as a hose to clean in case that is needed in certain circumstances...  

Washing hands isn't really a thing. Some bathrooms don't even have soap.

We first noticed this when we landed in Taipei for our layover. We stopped by the bathroom after landing to freshen up, and all of the women coming in to use the restroom would walk right out without washing their hands. 

One bathroom we used while we were at the White Temple in Chiang Rai didn't even have soap... so bring some hand sanitizer. :) 

The Skytrain is a great way for tourists to get around.

To be honest, if Mook wasn't with us I was most confident with getting around the city by using the Skytrain rather than taking a taxi everywhere. The public transit map was pretty simple to figure out, and the air conditioning in the train felt SO GOOD. The stops were very cool too - the ones that we saw had vendors that sold coffee and pastries, souvenirs, clothes, phone cases, jewelry, etc. 

The way that tickets work for the skytrain (if you are a tourist) is that you have to go up to the stations booth and tell the ticket person what stop you were travelling to. They would tell you the price and give you a ticket to swipe in, as well as to swipe out so you never keep the ticket. That was kind of a bummer for me because I love to keep tickets and maps of everywhere I go to put in my travel sketchbook. 

If you need to get somewhere that is an hour or so outside of the city, you can hire a driver for the day (no, it is not as expensive as you'd think).

You can either use Uber or Grab (which is also a taxi service app similar to Uber, but more popular in Bangkok) to schedule rides. Uber was pretty dodgy for me but that might have been because I turned my data off and was only using wifi for internet. 

There were two days where we had one driver for the whole day - one being in Chiang Mai when we did a whole lot of activities in one day, and the other when we went to an Island off the coast of a Thai Navy base (you can read more about that here). It ended up being a whole lot easier rather than waiting around for a car to pick us up when we knew that it would take a while for them to get to where we were. I felt a little bad though, because while we were out and about doing touristy things, the driver would stay back and wait until we were done - but it turns out to be a common thing. 

At the end of the day, it cost us around ฿3000 Baht (about $90 USD each) split between the three of us to have a driver for the entire day. Honestly, that is not bad at all and worth the money. 

There is a ฿5000 Baht ($150 USD) fine for not wearing a seatbelt in the car.

So wear your seatbelt... the traffic in Bangkok is crazy. Like NYC on steroids crazy. 

Taxi drivers are picky and sometimes refuse riders.

I am not sure exactly why taxi drivers are picky, but I think it is most likely to do with where the passengers are going. There were a few times when we wanted to hop into a cab but the driver told us to find another one. 

A lot of taxi drivers will scam tourists by charging them a flat fee rather than turning on the meter.

You can read more about our experience here in my Thailand trip summary post.  Whenever they tell you a flat fee rate before the trip, it is always a few hundred Bahts more than what the original cost will be. Make sure you tell the driver to turn on the meter, or you will find another taxi. 

There are stray dogs and cats everywhere.

It broke my heart to see all of the strays in the street, especially when it was late at night, pouring rain, and/or extremely hot and humid outside. These strays would commonly be abandoned by their owners and left at a temple so the monks could feed them. 

Yes, they are very cute but I would refrain from petting them because many strays we saw were very skittish or anxious. It is better to admire from afar rather than risk upsetting the stray and getting bitten. 

You can get a Thai massage for about $10 USD (except the good ones cost closer to $40 USD).

Thai massages are definitely a popular thing. Whenever we walked down the street in Bangkok, we would always pass a few spas that advertised Thai massages (for cheap). We were originally planning on stopping by one of the spas early on in our trip but never got the chance to. We ended up getting massages when we were in Chiang Mai at the resort we stayed at, which was one of the best decisions we made, because...

It. Was. Phenomenal.

Even though it was the first massage I've ever gotten, I knew that the bar was set high. Massages like that would easily cost $200-$300 back in the states. 

If you are a tourist, people claiming to be information guides may approach you and offer to take you all over the city. These are most likely scams.

This happened to Jordyn and I literally right after we landed in Bangkok and got through customs. As we were heading out to grab a taxi to our Airbnb, a man from the information booth approached us and asked where we were heading to. We showed him where our apartment complex was, knowing that it was going to cost somewhere around ฿300 Baht ($9 USD) according to Mook. He told us that he could get us a car for a flat rate of ฿1000 Baht ($30 USD) including the charges for tolls, so we said no and headed outside. 

At Suvarnabhumi Airport, the way you grab a cab is by taking a ticket from this machine that is outside and it will give you a number to tell you which cab to go to. There is also a sign that says you will be charged a ฿50 Baht ($1.50 USD) surcharge, plus the amount that is measured on the meter. Great, so with that in mind, we went to our cab and got into the car. After seeing where we needed to go, he called the Airbnb that we were staying at - I think to make sure we were legitimate and had a reservation (it was kind of weird). After that was settled, he told us the flat rate of ฿600 or ฿700 Baht ($18-$22 USD), to which we responded by pointing to the meter that was covered by a cloth and asked him to turn it on (he thought he was so clever...). He then started negotiating prices with us, which made it obvious that he was definitely trying to scam us. Eventually, he turned on the meter and we were on our way. So if that ever happens to you, make sure the cab drivers turn the meter on, otherwise find a different cab. It may sound like a big fuss considering that cab rides are much cheaper than ones you would take in Chicago or NYC, but it is bad for Thai tourism and it is just not right to be scammed in general no matter what the cost is. 

Food

There was A TON of food that I tried, and with Mook being a local, there were some things that she bought and made us try without telling us what it was. My suggestion is to do just that! Just be careful with the type of food you eat. Luckily, I did not end up getting sick; when I went to get my vaccinations, the doctor told me to avoid foods with uncooked vegetables, lettuce, fruit with a thin skin (apples, grapes, etc. Probably also mangoes but I had them everyday because they were the best mangoes I have ever had in my life) and DO NOT DRINK THE TAP WATER (however I brushed my teeth with it and I was fine). 

Here are some of the foods that we had:

  • There is street food everywhere you go (so you don't have to worry about starving)

  • Thipsamai (Restaurant): They are known for their Traditional Pad Thai and makes some of the best in the city (even Mook said that it was the best she's ever tried). Also order their orange juice that comes in a bottle. I have never tasted orange juice that was so fresh.

  • Fresh mango and sticky rice - We bought some from a street vendor in Chinatown

  • Coconut ice cream served in a coconut from a street vendor

  • MOS Burger (Fast food joint): Japanese style fast food burger (patty, cheese, special sauce that tastes like marinara, tomato). We went to the one that is in Siam Shopping Center.

  • Art Bar (I'm not sure if this is the correct name, I'm having trouble finding it online): Thom yum goong (shrimp), tom kha (coconut curry), Thai basil stir fry.

  • Khao Soi - This is a traditional northern dish that we had when we were up north in Chiang Mai.

  • Sweet snack (little tortilla shells with sweet plum and something else (maybe a vegetable?) that is shredded)

Thai Phrases

Note that this is my interpretation of how these phrases sound vs. how they are actually spelled. The majority of restaurants we ate at or stores we shopped at, the people who worked there would say 'thank you' to us in English, but we would say 'thank you' in Thai and you could tell that they really appreciated that. Personally, languages are not my strongest subjects so it took a while for me to say it right and with confidence... Mook would always yell and me to say thank you in Thai. (lol)

  • Cob-poon-ka : Thank you

  • Sa-wad-de-ka : Hello/Hi

  • Chai-ka : Yes

  • Mai-chai-ka : No

  • Suai-jung-ka : You're pretty

  • Rak-nak-joob-joob! : Love you, kiss kiss!

  • Kaw-toad-na-ka : Excuse me/Sorry

  • Aroon-sawat : Good morning


If you have any questions about anything that was mentioned, or anything that I didn't cover, feel free to leave me a comment below!

Studio Vlog 002 // Mini Travel Sketchbook Tour + Planning a Painting

Mini Sketchbook Flip-Through + Planning a Painting-2.png

Hi again! My second Studio Vlog! I had lots of fun collecting little snippets of my week and piling them together. It let me reflect and gave me a sense of what I accomplished in the week and what I should work on for the weeks ahead. 

I continued to work on most of my projects for Thailand, including the travel sketchbook which you get a glimpse of in the video. There will be a time-lapse video of how I filled out a spread coming soon, as well as a full sketchbook tour when I am completely done! (Which probably won't be for a while, I'm not even close to being done with it yet! 😬🤷🏽‍♀️). 

I also started to plan out a painting for my own apartment by mocking it up in my sketchbook - I plan to start on it in the next few weeks. There are two separate canvases hanging over my sofa with maps of various European cities that I collected during my travels that are shellacked onto them. I plan on putting a wash of white over them so the maps are still visible and painting vintage objects that relate to my interests (photography, art, travel). I will be filming a video of me working on them separately. 

I hope you enjoy, and feel free to subscribe to be the first to know when I upload! :) 

Studio Vlog 001 // Finding My Rhythm as an Artist

Finding a rhythm to my art style has been a challenge for me over the past couple of years (honestly, more like ever since I got into art). With social media being an ever-growing platform for creators, I (and probably many other artists) have found it to be difficult to figure out what my style is and how to portray myself through my work as such. 

FINDING MY RHYTHM AS AN ARTIST.png

I've been wanting to start studio vlogs for a while now, which is basically "behind the scenes" looks of projects I'm working on. I have been putting these videos off for a couple of reasons... One is that I didn't think I had enough time in the week to do it. Then I came to the conclusion that if I want to do something, I will find time in my schedule to do it. The other thing (being super lame) was that speaking to a camera to put it out for my friends, family, and anyone else to see has always been daunting to me.

I know that I just have to bite the bullet and go for it if I want to continue to grow as an artist. I have seen other artists on YouTube grow with their work over the past few years through their studio vlogs and have learned so much from them. I love seeing what they do in their workday because every single one has a different creative process, and it is also an incredible way to connect with the audience on a more personal level. 

So, I finally sat down to do an introduction video so you can put a face to the name and the channel (since this is my first video where I'm speaking to the camera, please excuse any of my awkward and cringy mannerisms. I promise that I will get better...).

I can't wait to not only show others what I do throughout the week as an artist but to also document my growth and learn by doing. Feel free to subscribe to my channel to follow along - I hope you enjoy. :) 

Cheers,

-TJ

My Week in Thailand

My Week in Thailand.png

(This blog post may contain affiliate links. If you click on one of my affiliate links and make a purchase, I may receive a small commission for referring you. This comes at no additional cost to you. Please note I only offer resources that I have used and strongly recommend!)

I was at work when I received a text from one of my college friends, Jordyn, asking me an abrupt question... "Do you want to go to Thailand this summer?!"

Uh... YEAH!!

I already had another big trip booked for later in the year and thought that I wouldn't get approval from work to take some more time off. The worst they could say was no, so I gave it a shot and asked... an hour later, Jordyn and I were silently screaming with joy when we both had the go-ahead from both of our companies! 

With two months to plan, we booked our flights, booked an Airbnb, and had a general outline of what we wanted to do. The reason why this trip was so abrupt is that a college friend of ours, Mook, who was an international student in the states lives in Bangkok and planned on moving out of Thailand in early 2019, so we saw it as the last opportunity to visit her while she was still living there.  

With Mook being a local, traveling with her helped us out immensely when it came to figuring out the transportation system and finding places that were not touristy. She really took the reigns on coming up with an itinerary that made sense for the amount of time we had out there and making the most of each day. With the amount of stuff we ended up doing, it felt like we were there for two weeks rather than just one.

July 10th-11th, 2018

Our flight was on Wednesday, July 11th at 12:30 am, so we left for O'Hare Airport Tuesday night at 8:00 pm.

Among my family and friends, I am known for having bad luck with flying. Anything from the kid sitting behind me kicking my seat for the entire flight to mid-flight engine failures and emergency landings in a foreign country. For the most part, our flight went smoothly. It was on time, and we ended up taking off twenty minutes before we were supposed to. The only things we encountered on the flight was a screaming/kicking child behind us, along with an older Taiwanese woman who sat next to me and told me about her life story and Taiwanese politics while my eyes couldn't stay open. 

In conclusion, there were no delays, no lost luggage, and no emergency landings. (YAY!)

Thursday, July 12th, 2018

We landed in Taipei for our layover at 4:20 am. We found some bathrooms to freshen up after the 15-hour flight, and the first thing both Jordyn and I noticed was that the Taiwanese/Thai women would not wash their hands after they were done using the restrooms. Later throughout our trip, we came to realize that that was a common thing, so if you are a germophobe, you might just have to accept the fact that washing your hands isn't really a thing there. So make sure to bring hand sanitizer with you. 😊

For the few hours we had until our next flight, we chilled out and grabbed some coffee.

Getting from the airport to our Airbnb

Our connection flight landed at Suvarnabhumi Airport in Bangkok around 11:30 am. Getting through customs was a breeze... getting a cab to our Airbnb wasn't so much. One thing we experienced right away was that tour guides and cab drivers would try to scam us by setting a flat rate fee of what they wanted to charge us for the ride rather than turn the meter on at the start of the trip. Luckily Mook warned us about the scammers and told us to get another cab if they refused to turn on the meter. The few cabs we took throughout the trip sometimes had a cloth covering it claiming that it was "broken"... Once they realized that we were not going to let it go, they started negotiating prices with us, which told us the meter worked just fine. (TIP: If the cab drivers won't back down, either get out of the cab and find a new one, or take a picture of their driver's information that is on display and report them. It may sound harsh but it is bad for Thai tourism and there are always more ethical ways of making extra money.)

Nonetheless, we made it safe and sound to our Airbnb and were blown away by the streets and views of Bangkok!

Our Introduction to Bangkok

We met up with Mook off of the Thong Lo stop of the Skytrain, which was where our Airbnb was located. From there, we took the train to the Siam stop to explore the area. We walked around the Siam Shopping Center and chilled out at a rooftop bar called The Escape Bangkok for some drinks. We then had some dinner at a small hole-in-the-wall restaurant that I think was called Art Bar and sat towards the back of the restaurant where there was a small, charming outdoor courtyard decorated with hanging plants and outdoor seating.

Mook was in charge of ordering, so we ate Thom Yum Goong (Shrimp), Tom Kha (Coconut Curry), and Thai Basil Stir Fry. The jet lag really hit us hard by the time we got our food and I started to doze off at the dinner table...

We left the restaurant an hour or two later and looked for a cab to take us back to our Airbnb. While we were waiting in a pickup line, a tuk-tuk driver pulled up and stopped right in front of us. He noticed us, two American women, with a local so he was pushing his sales onto Mook - telling her that she needs to give us the experience of riding a tuk-tuk in downtown Bangkok! The whole time, they were bantering back and forth in Thai (Jordyn and I, of course, had no idea what they were talking about), but we could tell that Mook was showing no interest in continuing on with the conversation. This guy did not give up and eventually, Mook gave in - and well, this happened:

Friday, July 13th, 2018

We woke up at a decent hour despite the 30 hours of traveling we did the day before and the 12 hour time difference from Chicago. Around 9:00 am, we went to breakfast at the cafe attached to our Airbnb called Hands & HeartThey serve some amazing Thai style coffee and black (!!) croissants.

We then toured some temples around Bangkok, including the Grand Palace, Wat Arun Ratchawararam, and the Golden Mountain. The Grand Palace was the most strict when it came to being covered. I brought a scarf to wrap around my shoulders but that wasn't enough. A small part below my neck was showing, so the temple employees told me that I had to buy a shirt from one of the gift shops in order to enter the front gates. 

In the evening, we ventured out to Chinatown which is a whole monster of its own. We cabbed it there and the moment we stepped out of the car, it was sensory overload. People recognized Jordyn and I as Americans so they were shouting at us to come and buy their food (I think) and there were SO MANY people. If you are like me and have a personal bubble that extends at arm's length around your body, you just have to get over that because Bangkok is so populated, and people will constantly be bumping into you. 

I remember this night as the one where we ate our way through Bangkok. We enduldged in street food, including sticky rice and a few other dishes that I can't quite tell you what they were.

We also ate at a very well known restaurant called Thipsamai, which is know to have one of the best pad thai dishes in town. The restaurant has their kitchen outside on the street so people who are lining up to be seated can stand by and watch the food being cooked. 

To end our night, we experienced a bit of the nightlife of Bangkok. Again, sensory overload. There was so much going on at the same time, and when you add the jetlag on top of everything, it is so overwhelming. At one point, there were two outdoor clubs across the street competing against each other for the loudest music, vendors pushing carts down this crowded street selling food and souvenirs, a little kid kicking around a soccer ball, people getting Thai massages in lawnchairs on the side of the road, and a small dog passed out in a folding chair with his legs spread wide open for the world to see. I have never experienced anything on that level in the states before!

Saturday, July 14th, 2018

We took an 8:40 am train to another town an hour outside of the city called Ayutthaya, also known as the Ancient City. We met Mook at the train station, so Jordyn and I had to figure out how to use the subway system to get to the metro station (which turned out to be easy to navigate). When we got there, we bought some really delicious stuffed chocolate and almond cream waffles from a woman selling them at a small booth. Once we got on the train and found some seats (which was a challenge because it was first come, first serve), Mook bought a Thai tea from an older woman selling them on the train, then spilt it on Jordyn within the first ten minutes of the ride. By the end of the trip, the tea had travelled to the other side of the train car and to other passenger's feet.

That town has temples dating back as early as the 1700s! The temples we saw were Wat Mahathat, Wat Chaiwatthanaram, and Wat Yai Chai Mang Khon. We then finished up our trip with visiting some elephants and experiencing a floating market.

Sunday, July 15th, 2018

On day four, we had an 8:45 am flight from Bangkok and landed in Chiang Mai around 9:30 am. We caught a cab from the airport to take us to our resort, Panviman, that was about a 45-minute drive up into the mountains. We were all very excited considering how much cooler the temperature was and how much less populated northern Thailand is compared to Bangkok.

Once we arrived at our resort, we had an hour or so wait for our room to be ready, so we just waited by the pool. After check-in, we got settled in and caught a 4:00 pm shuttle bus to the city of Chiang Mai. We went out to eat some traditional Northern Thai food, wandered around the coffee district and stopped for some delicious dessert at Iberry.

Monday, July 16th, 2018

Day five was a very adventurous day. We went bamboo paddle boarding, hung out with more elephants, rode and operated our own "jungle coaster", ziplined, went sightseeing over mountain farms, and I experienced my very first massage... it was incredible, however the problem I have now is that it set the bar so high where I'm not sure if I will be able to have another one in the States which is just as good for the price I paid ($40 USD!!!). 

Tuesday, July 17th, 2018

We woke up and headed straight to the pool to catch some rays before catching a bus to Chiang Rai - it was about a three-hour ride that dropped us off right outside of Wat Rong Kuhn (also known as the White Temple).

This temple turned out to be the most bizarre one we saw because it was the architect's/artist's intention to make it a contemporary art exhibit in the style of a Buddhist temple. It was designed, built, and opened to visitors in 1997. At the entrance, there is a sea of hands coming out of the ground with two curved horns at the start of the bridge. Upon entering the temple, the inside looks similar to the others we previously visited. Then, we looked closer at the artwork painted on the walls; within the painting of what looked like a landscape of a city mixed with a solar system were paintings of characters from movies such as Harry Potter, Kung Fu Panda, Superman, The Minions, Angry Birds, Transformers, and so on. 

Once we were finished exploring the temple grounds, we caught a cab to go to an English style cafe called Chivit Thamma Da. We had some amazing coffee, dinner, and dessert before heading to the airport to get back to Bangkok.

Wednesday, July 18th, 2018

The last day of my trip for me was a little bittersweet. I couldn't wait to see my friends and family to tell them about my trip, start editing all of the photos I had taken as well as get some much-needed rest considering we were getting an average of 4-6 hours of sleep every night. 

On our last full day in Bangkok, we decided to make it a beach day. Waking up, we realized the forecast was calling for some showers, but it turned out to be the most beautiful day out of the whole trip. 

The beach we went to was on an island in the Gulf of Thailand. We had a driver for the day take us about two hours from Bangkok to a Royal Thai Navy Base (this was the same team that helped rescue the Thai boy's soccer team from the cave earlier in the month!). On a daily basis, the Thai Navy takes people on one of their boats to an island off the coast for some extra money. I was not at all expecting the experience that we had...

Even though the skies were clear that day, it was extremely windy and the waves were very choppy. Getting onto the boat was quite a process; between the deck and the boat was about a five-foot leap. When it was your turn to jump on the boat, four or five Navy sailors grabbed a hold of you and catapulted you on board while the boat was intensly rocking up and down. When everyone was on the boat (50+ people, most being locals), we set off for the island. What should have been a 20-minute boat ride turned into an hour because of the wind.

We finally arrived at our destination, and getting off of the boat was a bit more challenging. Mook, Jordyn and I were some of the last ones off the boat; as we stood up to get off, some crashes of waves moved the boat so both Jordyn and I went down and couldn't stand up. As we were laughing at ourselves, still struggling to get up, one of the sailors came over and grabbed both Jordyn and me by the arms, handed us over to the sailors tossing people off the boat and we stuck the landing. I am happy to announce that neither of us got seasick. 

We had a few hours to spend on the island before the last boat left for the mainland. There was a camp base area where you could rent equipment for snorkeling, canoeing, as well as general beach lounging equipment.

One other thing that was located on the island (which later came in handy for me) was a medical tent in case there were any injuries among the island's visitors. Well... twenty minutes into our beach visit, we were in the water and I stepped on a sea urchin (Uni fish). It was more painful than getting a tattoo!

It turns out that my foot will be okay. There are still needles in there as I write this, but they are working their way out and disintegrating (sorry to those who do not like feet).

Thursday, July 19th, 2018

My trip sadly came to an end, and I headed off for a full 30-ish hours of travelling back to Chicago!

In Conclusion...

For a few months before my trip, I was in a bit of a creative rut. I wasn't inspired to create and I wasn't motivated to grind at my art and photography work, but this trip really came at the perfect time for me. The thing that I love most about traveling is that you learn things that school or your job can't teach you. 

Just this one week I spent with my friends in Thailand to experience its culture was what I needed to hit the reset button. We were able to do a lot, but one week is not enough and I do plan on visiting again someday.


*Keep an eye out for a separate blog post for tips and resources for traveling to Thailand.

*My professional photographs will be added to my photography portfolio as well as the prints available for purchase in my shop within the next few weeks.

The Brooklyn Sketchbook Project

ABOUT THE PROJECT

(This blog post may contain affiliate links. If you click on one of my affiliate links and make a purchase, I may receive a small commission for referring you. This comes at no additional cost to you. Please note I only offer resources that I have used and strongly recommend!)

sketchbook tour.png

Project started: August 4th, 2017

Project completed: April 28th, 2018

I have just completed The Sketchbook Project, an assignment ran by the Brooklyn Art Library in New York. This is a project that takes place worldwide by whoever wishes to join.

The requirements for The Sketchbook Project is to completely fill out the sketchbook and send it to the Brooklyn Library in New York City by March 2018 (update: the deadline was pushed to April 30th). There, it will be included in the library's permanent collection so anyone can check out and enjoy mine, or someone else's sketchbook.

The inspiration that is behind the illustrations in this sketchbook comes from food. I always come across pictures where you know someone had to have stood on their restaurant chair to get the bird's eye camera shot of their dinner spread. Viewers absolutely love food photography (as long as the food looks appetizing), so why not get involved with the trend by creating drawings and paintings of these delicious creations?

I decided to participate in this project to not only get more involved with the artist community, but also because of the concept behind it. Currently, I am an independent artist who works on personal and freelance projects out of her home; so more often than not, it can get quite lonesome being on my own. With this project, I am participating with hundreds (maybe thousands?) of other people from around the world to have a sketchbook of mine sitting on the shelf of the Brooklyn Library next to other aspiring artists. 

Keep scrolling to see every spread, as well as read about the stories that inspired every page!

Feel free to subscribe to my YouTube channel to receive notifications whenever I post. 

Here you can find the playlist for the time lapse videos I recorded of the project. Enjoy!


SKETCHBOOK TOUR

IMG_8242-2.jpg

It took me 9 months to complete this sketchbook, which to me, is a bit long for how small the sketchbook is. At the beginning of the book, I wanted to start off with a cover page to introduce those who will be viewing this by including my name as well as an old business card in case they wanted to look at more of my work. The cheeseburger was the first thing I thought of, and I really love writing in graffiti style font, so I thought that this would be a fun way to start off the sketchbook.


IMG_8243-2.jpg

This spread was dedicated to pizza. I do not have a specific favorite dish (because I can't decide!), but being from Chicago, pizza is definitely near the top of the list. We make handsdown the best pizza... okay, I may be a little biased... NYC gives us a run for our money, but I can argue that we definitely have the best deep dish pizza! 


IMG_8244-2.jpg

This spread was inspired by my generation, or more so... the man claiming that my generation cannot afford to buy a house because we spend too much money on avocado toast. It sounds dramatic, and hilarious when said as such, but it is actually an interesting article... give it a read.


IMG_8245-2.jpg

At my day job, we host many happy hours at our office and we get to indulge in some wine and charcutterie. This kind of display has always been one of my favorites, as there are so many different colors, textures and flavors elegantly displayed. 


IMG_8246-2.jpg

I strongly believe that ice cream is one of the best foods ever created. There are so many different flavors to choose from and many of the combinations can be very unique. If you are ever in Chicago, you HAVE to try Jeni's Splendid Ice Cream. They are by far the best I have ever tasted.


IMG_8248-2.jpg

My love for sweet treats continues in this spread with donuts and coffee! A funny story that inspired this is from my senior year of college, my roommate and I took a Pilates class to fulfill the minimum requirement to be a full-time student, and what stood between the subway stop and the classroom building was a Stan's Donuts & Coffee shop. We rewarded ourselves a few times after some intense classes. 


IMG_8247-2.jpg

To be completely honest with you, I cannot stand oysters. Their taste does not sit well with me as well as the texture and the way they are eating. But, I think they look really pretty! :)


IMG_8249-2.jpg

Almost similar with oysters, I am not the first to suggest sushi for a meal, however when I am in the mood for it I like the classic California roll or Ahi tuna. However, the last time I had sushi was with some friends last summer at an all you can eat sushi restaurant. They way it worked was that for every piece of sushi left over, an extra $2 was added to your bill, so of course we had to eat everything that was put in front of us... I can't say that I had a desire to grab some sushi since then. 


IMG_8250-2.jpg

If you are from the Chicagoland area, you know exactly what Portillo's is. The tasty Chicago dogs, mouthwatering dipped Italian beef sandwiches (if you do not know what these are, you're missing out), crispy crinkle cut fries, and satisfying cake shake (yes, it has an actual slice of cake in it) are all things that I have been enjoying since my childhood. 


IMG_8252-2.jpg

A sip of sangria brings back so many memories, especially when I was studying in Barcelona. One particular time was back on the beach at a restaurant with one of my roommates. We each ordered a pitcher of sangria (which in our defence, was about three-ish drinks total). Upon ordering, the waiter gave us a strange look and said to us, "You know, in our country less is more." We both proceeded to commit to the pitchers and finished each of them with no problems. Might I also say that we walked out of that restaurant... not stumbled... :)


IMG_8251-2.jpg

I like pancakes. 


IMG_8254-2.jpg

...and breakfast in general...


IMG_8253-2.jpg

Even thought grilled cheese is one of the easiest things to make, my brother does a really good job of making it authentic. He hand shreds three different types of cheeses and grills it perfectly to to the crisp. 


IMG_8255-2.jpg

Now this is a weird guilty pleasure of mine... for a snack, I love pickles and peanut butter. I got the inspiration from somewhere, I just don't remember. But particularly I love the bread and butter slices with extra crunchy peanut butter. Give it a try before judging me. :)


IMG_8256-2.jpg

Before I tried chicken and waffles, I did not understand at all why that combination would be good (says the person who loves her pickles with peanut butter). I tried it for the first time at the Chicken Shop at Soho House in Chicago. It was amazing to say the least...


IMG_8258-2.jpg

This is the page I used to test sample swatches of water color as well as display my business card and social media information.

*** Flip-through video is coming soon!!

Starting a Bullet Journal

(This blog post may contain affiliate links. If you click on one of my affiliate links and make a purchase, I may receive a small commission for referring you. This comes at no additional cost to you. Please note I only offer resources that I have used and strongly recommend!)

bulletjournal.png

In the past couple years, this new trend of "bullet journaling" has exploded. I see it all over Pinterest, and as a creative, I instantly became intrigued with this new thing that many people are adding to their daily routines. I have tried to start a bullet journal before but became intimidated numerous times and failed to complete my first spread. I always thought that a bullet journal had to consist of a crazy amount of spreads that tracked every single part of your daily life (e.g. water intake, mood, exercise, sleep, habits, chores, etc. etc. etc.).

All of these things are very important and are great to keep track of it all in one place, however, as someone who is constantly on the go I knew that if I were to start some spreads that consisted of all these "trackers," I would not keep up with it, so I was okay with keeping my journal as simple as possible.

Before we go on any further, what exactly IS a bullet journal? Well, according to bulletjournal.com, "The Bullet Journal is a customizable and forgiving organization system. It can be your to-do list, sketchbook, notebook, and dairy, but most likely, it will be all of the above. It will teach you to do more with less." Awesome. So it can be whatever you want it to be! And the whole purpose of it is to boost your productivity.

So how should you start? Well, here is what I did...

Here are the supplies I purchased from Amazon to use in my bullet journal:

As a newbie, I knew that I did not want to over complicate my bullet journal so I created spreads that I knew I would use or reference back to throughout the year. I purchased notebooks that had dotted paper opposed to lined, blank or grid paper because the dots would be a great guide for me to layout my spreads without being too visible and distracting from my journals contents. I also had ink pens, washi tape, and a small transparent ruler on hand. Feel free to use your favorite supplies to create your own bullet journal.

To come up with the layout of my bullet journal, I simply thought of the goals, projects, and habits that I wanted to work on throughout the year. This way I knew exactly how to utilize every page of my journal to help me track and achieve year-end goals.


Here is exactly how I laid out my first bullet journal in a simple format:


Cover Page: Inspirational Quote

Untitled_Artwork 2.jpg

I feel as though this is a great way for me to start out any sketchbook or journal. It takes away the fear of messing up on the first page and it sets the tone of the whole sketchbook. In this case, I simply searched my Pinterest boards for an inspirational quote and found "Everything will work out." Very fitting to start off a bullet journal. And lastly, I bought these adorable cactus stickers from HaNaCoOL's Etsy shop.

Spread 1: Index / Master Key

Untitled_Artwork.jpg

This spread is very straightforward, however the further along I got to laying out my bullet journal, the more I noticed that this spread wasn't crucial and did not serve much purpose for it to be in my bullet journal. I initially included it to be where I would write in the key for the symbols used throughout the journal, but because I am including keys on each spread for the symbols that are used on those pages, I feel as though this master list isn't always necessary for me to include. I do, however, have an Index where I keep track of the order that my spreads are in, and I am currently trying to figure out what to add onto the blank page.

Spread 2: Yearly calendar / 6-month and 1-year goals

Untitled_Artwork 3.jpg

Having the calendar spread out on one page really puts timing in perspective for me. A year to some people seems like a really long time, but once they get to the end of it they say that it has flown by. Well, it has flown by because one year really is not a long time!! This is a great way for me to light the flame under my butt and start on the next project sooner rather than later. I also included a list of goals I want to accomplish at the 6-month benchmark, as well as what I would like to complete at the end of the year.

Spread 3: Brain Dump / Social Media Trackers

Untitled_Artwork 4.jpg

Art, photography, and traveling are my passions and hobbies, and one day they will be my full-time career. In order for that to happen nowadays, it is helpful to have a decent following on social media. So in order to stay updated with the growth of my platforms, I am keeping track of how many followers I start with at the beginning of each month. I also have included a "brain dump" page to jot down any ideas that come to mind so I do not forget about them later.

Spread 4: Monthly Spread

Untitled_Artwork 5.jpg

This is a great way to start off the month because you can add so many layers to this spread. For this month, I have the monthly calendar where I mark dates of when I will make my social media posts, along with goals that I set for myself to reach in April, Notes/To do's, as well as a column for me to write down any important dates to remember that would not fit in the calendar layout.  

Spread 5: Week 1 Spread

Untitled_Artwork 6.jpg

I stuck with simplicity for the design of my first weekly spread since it was my first time creating a layout for a bullet journal. I included a "side bar" on each page to include an April thumbnail calendar reference, weekly goals, blog post and video ideas.

What I plan to include for the future

In the current state of my art career, I am still figuring out what I would like to do in order to grow. I have an idea, but I am someone who needs to have tasks and lists written out in order for me to feel organized, which is initially the reason why I started bullet journaling (hopefully it continues!! 😬). To take it a step further, I am going to incorporate a Habit Tracker to keep my daily chores and assignments in check to help my art career flourish. 

My initial thoughts on bullet journaling

Overall, I really enjoyed planning out the layouts and catering my bullet journal to my needs in order to be the most productive I can be. I hope that I can continue on with this and I am looking forward to delving deeper into the world of Bullet Journaling!!

In the comments below, tell me what you do in order to be productive?